Tuesday, December 9, 2014


Friday, August 14, 2009
The gallery is open for business!
My first two pieces that I've put up are both 8 x 12 prints, mounted on foamcore for easy hanging or framing.


Both are up for $20 each. Check out my Etsy shop for more details!
Tuesday, June 23, 2009
Tofooled You! Vanilla "Cream" Pie for Father's Day
But I digress...
We returned from Lake Powell late Saturday, and I luckily had Sunday off from work, which allowed me to turn my attention to Father's Day, and what to make. I wanted something a bit on the light side, considering the week-long snacking fest on the houseboat. I thought about a cream pie, but wanted to lighten it up a bit. I then remembered (with a laugh) a few years back, fooling everyone at an Independence Day barbecue, by serving a chocolate cream pie that was no usual cream pie, in that it contained no cream...but instead used a base of tofu. ^_^ So I went back to that recipe (Alton Brown's Moo-Less Chocolate Pie), and did some modification to use what I had on hand. (I was still recovering from the long drive and unpacking and cleaning that accompanies one's return from vacation.)
I thus give you the Vanilla "Cream" Pie with a Gingersnap Crust!
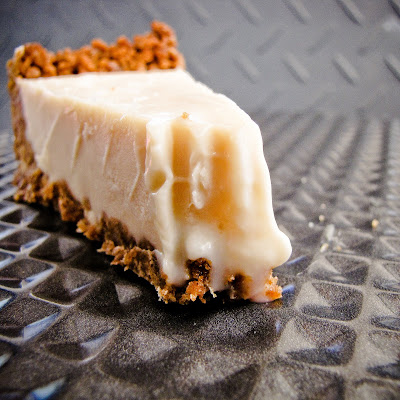
As is, it makes a light, sweet treat for warm weather, though I think that next time I make it, I'll probably add some cardamom to the filling. I think it would accent the gingersnap crust perfectly! This recipe is also a good starting point for further modification. How does a mint cream pie with chocolate crust sound?
Vanilla "Cream" Pie with Gingersnap Crust
For Crust
1 2/3 cups Gingersnaps, finely ground
1/4 cup Butter, melted
1/4 cup Sugar
Combine all ingredients in a bowl, then press into a 9-inch pie pan.
Bake at 350° F for 10 minutes. Set aside to cool.
For Vanilla "Cream" Filling
2 cups Vanilla (White Chocolate) Chips
1/3 cup Milk
1 block Silken Tofu (I used Mori-Nu)
1 tsp. Vanilla Extract
2 tbsp. Honey
Using a double boiler, melt the vanilla chips and milk, stirring until smooth. Add vanilla and honey.
In a blender, combine the tofu and white chocolate mixture. Liquefy until smooth.
Pour filling into the gingersnap crust. Chill in the fridge until cooled and filling begins to set, then transfer to the freezer until the pie is set solid. This not only makes the pie all the more refreshing to east, but it also makes it much easier to cut and serve.

Wednesday, June 10, 2009
Galactic Cookies and Crappy Photoshopping...YAY!

I've seen photos of these kinds of swirl cookies floating about Tastespotting and other food blogs and decided to add my own spin to them when I noticed their galactic nature. I settled on a recipe I found on FoodNetwork.com, but decided to top them with those chocolate buttons that are covered with those candy dots. I think the buttons add an accent of sweetness to an otherwise not-so-sweet cookie.
They are mighty tasty, though, if not a bit labour intensive. Give them a go if you're looking for a cookie with some visual punch for your next cookie swap!
Galactic Swirl Cookies
via FoodNetwork.com
modified by Tom
Vanilla Dough:
1/2 cup granulated sugar
2 tablespoons confectioners' sugar
1/4 teaspoon fine salt
1 large egg
1 to 1 1/4 teaspoons vanilla extract
1 cup unsalted butter, (2 sticks), room temperature
2 cups all-purpose flour
Chocolate Dough:
1 1/4 cups granulated sugar
3/4 cup natural cocoa powder
1/4 teaspoon fine salt
1 cup unsalted butter, (2 sticks) room temperature
1 large egg
1 1/2 cups all-purpose flour
About six dozen chocolate buttons
Directions
For the vanilla dough: Mix the 2 sugars and the salt together in a medium bowl. In another small bowl, whisk the egg and mint extract and set aside. With a hand held mixer beat the butter until smooth in a large bowl. While mixing, gradually add the sugar mixture, and continue beating until lightly colored and fluffy, about 1 to 2 minutes. Stop mixing and scrape down the sides of the bowl. Add the egg mixture and beat until smooth. Gradually add the flour, mixing slowly until blended.
Turn the dough out of the bowl, divide in half. Place the halves between 2 pieces of lightly floured parchment or waxed paper. Roll into a 10 by 12 by 1/4 inch rectangle. Slide the sheets of dough/parchment sheets onto a baking sheet, and refrigerate until firm, about 2 hours or overnight.
For the chocolate dough: Whisk the sugar, cocoa, salt in a medium bowl. With a hand held mixer beat the butter until smooth in a large bowl. While mixing, add the cocoa mixture, and continue beating until lightly colored and fluffy, 1 to 2 minutes. Stop mixing and scrape down the sides of the bowl. Add the egg and beat until smooth. Gradually add the flour, mixing slowly until blended.
Turn the dough out of the bowl, divide in half. Place the halves between 2 pieces of lightly floured parchment or waxed paper. Roll into a 10 by 12 by 1/4 inch rectangle. Slide the sheets of dough/parchment sheets onto a baking sheet, and refrigerate until firm, about 2 hours or overnight.
For a spiral cookie: Put 1 of the chocolate doughs on the workspace and remove the top sheet of parchment. Brush dough lightly with cold water. Place a sheet of vanilla dough on the workspace, and remove top sheet of paper. Using the bottom piece of the paper to lift the dough, place the vanilla dough on top of the chocolate dough. Take care to line up the edges of the 2 doughs and trim as needed. Lightly press to smooth and seal the doughs together. Remove the top piece of paper. Brush the surface of the dough lightly with cold water. Position the sandwiched doughs with the long edge facing you. Using the edge of the paper as a guide, roll the doughs into a tight cylinder, 2 inches wide. Wrap in plastic and refrigerate for 1 hour. Repeat with remaining 2 sheets of dough.
Evenly position racks in the oven, and preheat to 325 degrees F.
Slice the dough crosswise into 1/4-inch thick cookies. Lay about 1/2-inch apart on parchment-lined baking sheets. Bake until just golden - not too dark you'll lose the definition of the spiral, about 14 to 16 minutes. After removing from oven, place one chocolate button in the center of each cookie. Allow cookies to cool until chocolate re-solidifies. I put mine in the fridge to expidite this process.
Wednesday, June 3, 2009
Strawberry Kiwi Oatmeal: Simple, Seasonal, and Slow

I have had this love of oats for the past few years now, and I never seem to grow tired of them, especially Irish oats (a.k.a. pin-head oats or steel-cut oats). Sure, they take twenty minutes to cook, but they're well worth the effort. They're chewy and just more satisfying to eat than rolled oats. I don't really follow a recipe per se, when I make oats, I just go with the flow of what I have on hand. The only "recipe" is for the base oats...
1/4 cup Irish Oats
1 1/4 cups Hot Water
~ 1/4 cup Soy Milk, Buttermilk, and/or Plain Fat-Free Yogurt
Pinch of Salt
Throw the oats, salt, and water into a small sauce pan and boil on low until thick. Pour in your dairy, return to boil, simmer until thickened to your liking.
From here I add in whatever piques my palette. This morning I had strawberries and a kiwi on hand, so I took one big berry and diced it fine and did the same with half of the kiwi. These I added in about half way through the cooking process. Adding some of your ingredients while the oats boil allows them to cook into the oats and give you an overall background flavor. When the oats got to my desired creaminess, I sliced another strawberry and the other half of the kiwi and used them to top the oatmeal. I also took the liberty of adding a few drops of stevia extract to boost the sweetness factor, a bit.
Simple, seasonal, and slow.
Wednesday, April 8, 2009
Elderberry Liqueur
Elderberries, sugar, lemon, water, and vodka...that's it. Allow a month to mature and I should have my own wild elderberry liqueur!

I reduced the original recipe by two-thirds, to make a trial batch before committing more of these hard-to-find treasures of the mountain. ^_^
I'd like to note that this is not a place to use spendy vodka, I just used Smirnoff. Though I did go for the 100-proof stuff because I'd be watering the vodka down in the process of making the liqueur.
Wild Elderberry LiqueurNow the long wait begins..................
Originally by Pattie Vargas and Rich Gulling
Modified by moi
1½ cups Wild Elderberries
½ cup Sugar
½ tsp. Lemon Zest
2 tsp. Lemon Juice
½ cup Water
1 cup Vodka (100-proof)
Crush the elderberries and sugar in a bowl and let sit one hour. Add lemon zest and juice, stir to combine. Transfer the elderberry mash into a clean, quart jar. Add the water and vodka. Age in a dark, cool place for one month, shaking once or twice a week.
Strain and filter the mixture, then transfer to a bottle. Age another month for best results.
Monday, March 16, 2009
Blood Orange Marmalade
I decided, yesterday, to get off my keester and actually do some cooking; as I've been without much in the way culinary inspiration as of late, evidenced by my lack of posts this year, thus far. Yesterday, however, while at Harmon's I saw they had blood oranges for a reasonable $1.19/lb and was instantly hit with an idea...blood orange marmalade! I grabbed a bag of oranges and went home and looked for recipes.
I recalled having seen a recent episode of Good Eats where Alton Brown focused on the orange and even made marmalade. Alton's recipes have never let me down, so I decided his was the one. It is simple and pretty straight forward, which is what I like about Alton's recipes, he doesn't monkey around, just good food done right.
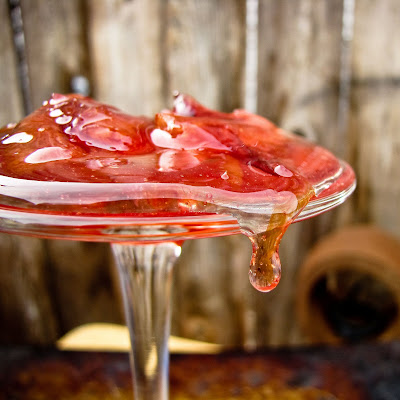
The blood oranges gave the marmalade a rich, ruby color and a slightly more tart flavor than other marmalades that I've had. It really does have a sense of being a more "grown up" marmalade. The only complaint I have is that there must be something awry in the recipe. First off, the recipe says that it should take 15 to 20 minutes for the marmalade to heat to 222°F, it took mine nearly an hour. I've never had it take so long to heat a pot of preserves. Also, now that it's set, the marmalade is very stiff, sticky and almost candy-like in texture. All the marmalades I've had in the past have a more loose consistency. I'm not sure if this is how Alton Brown intended in to be, or if there's a flaw in the recipe. I also ended up with about 60 oz. of marmalade, rather than the 80 oz. the recipe said I should have. It is good, though, and I do recommend you give it a try. Maybe we can compare notes and figure out what may or may not have gone wrong or right.
Blood Orange MarmaladeI also want to note that if the canning portion of the recipe doesn't appeal to you, then you can also just freeze the marmalade. I wanted to go all out, though, so I pulled out my canning equipment and boiled away!
via Alton Brown's Good Eats
1 3/4 pounds blood oranges, 4 to 5
1 lemon, zest finely grated and juiced
6 cups water
3 pounds plus 12 ounces sugar
Special Equipment: 10 (8-ounce) canning jars with rings and lids, funnel, tongs, ladle, and 12-quart potWash the oranges and lemon thoroughly. Cut the oranges into 1/8-inch slices using a mandoline, removing the seeds as you go. Stack the orange slices and cut them into quarters. Place the oranges into an 8-quart stainless steel pot. Add the lemon zest and juice and the water to the pot, set over high heat and bring to a boil, approximately 10 minutes. Once boiling, reduce the heat to maintain a rapid simmer and cook, stirring frequently, for 40 minutes or until the fruit is very soft.
While the fruit is cooking, fill a large pot (at least 12-quart) 3/4 full with water, set over high heat and bring to a boil. Place 10 (8-ounce) jars and rings, canning funnel, ladle, and tongs into the boiling water and make sure the water covers the jars by at least an inch. Boil for 10 minutes. Turn off the heat, add the lids and leave everything in the pot until the marmalade is ready.
Meanwhile, place a small plate in the freezer. Increase the heat under the orange mixture to return to full boil. Add the sugar and stir the mixture continually, until it reaches 222 to 223 degrees F on a deep-fry or candy thermometer, and darkens in color, approximately 15 to 20 minutes. You may need to adjust the heat in order to prevent boil over. Test the readiness of the marmalade by placing a teaspoon of the mixture onto the chilled plate and allowing it to sit for 30 seconds. Tilt the plate. The mixture should be a soft gel that moves slightly. If mixture is thin and runs easily, it is not ready.
Remove jars from the water and drain on a clean towel. Place a canning funnel onto the top of 1 of the jars and ladle in the marmalade just to below the bottom of the threads of the jar. Repeat until all of the mixture has been used. The amount of marmalade may vary by 1 to 2 jars. Wipe the rims and threads of the jars with a moist paper towel and top each with a lid. Place a ring on each jar and tighten.
Return the jars to the pot with boiling water, being certain that they don't touch the bottom of the pot or each other. (If you don't have a jar rack, try a round cake rack, or metal mesh basket. Even a folded kitchen towel on the pot bottom will do in a pinch.) Add additional water if necessary to cover the jars by at least an inch. Boil for 10 minutes. Using canning tongs, carefully remove the jars from the water, place in a cool dry place and allow to sit at room temperature for at least 24 hours before opening. Once open, store in the refrigerator. Unopened marmalade will last for up to 6 month.
Epilogue: This morning I took my open jar of marmalade, popped it in the microwave at 50% power for about thirty seconds, then stirred in about one or two tablespoons of hot water. After sitting in the fridge for a couple of hours I found that it loosened up, so it's easier to scoop and has a consistency I more associate with a marmalade.
Tuesday, February 24, 2009
Chocolate + Cardamom + Bread = T3h Awesome!
I don't know why, but the thought of a chocolate bread popped into my mind pretty quickly. I did not, however, want to end up baking what amounted to a chocolate loaf cake...I wanted bread, the kind with yeast you get to knead in a Tai Chi-like motion, thus gaining peace and mental centrality. (I think I just made up that last bit, but it sounds good so I'm rolling with it!) I hunted about for recipes and finally found one that fit the bill!

The bread come out looking like a loaf of whole wheat bread, even though it's all just unbleached AP flour--ah, the wonders of unsweetened cocoa powder. The chocolate flavor isn't apparent at first, but it sinks in as you chew. I took a little liberty with the recipe and added in a couple of pods worth of fresh ground cardamom seed (my favorite spice), which gave it that little something of curiosity. The white you see on top of the loaf is just more flour, though I did consider powdered sugar, but wanting to keep with a non-sweet chocolate bread, I opted instead for flour.
All and all I do like the bread, and it makes for a killer peanut butter and jelly sandwich!
Chocolate Cardamom Bread
via About.com and tweaked just slightly by moi.
4 cups Unbleached AP Flour, approx.
¼ cup Unsweetened Cocoa Powder
2 tbsp Sugar
1 tbsp Brown Sugar
2 ¼ tsp (or one packet) Active Dry Yeast
1 tsp Salt
1 tbsp Vegetable Oil
1 ½ cups Warm Water (about 110°F)
In large bow, mix together 2 cups bread flour, cocoa, sugar, brown sugar, yeast, salt, oil, and water. Mix in the remaining flour, about a quarter cup at a time, until a soft dough forms. Turn dough out onto lightly floured board and knead for 5 minutes, adding only a small sprinkle of flour each time the dough gets too sticky.
Put dough in greased bowl. Turn dough over in bowl so that the dough top is also lightly greased. Cover bowl with plastic wrap or clean kitchen cloth and let rise in warm place for 1 hour.
Punch down dough. Turn dough out onto board and knead for another 5 minutes. Shape dough into loaf. Put loaf in greased 9x5-inch loaf pan. Cover loaf and let rise for about 30 minutes or until double in size.
Bake at 400°F for about 25 minutes or until bread sounds hollow when you tap on it.
Friday, February 20, 2009
Excuses
Hang in there folks and satisfy your hunger by rummaging through my previous posts to hopefully find your own inspiration.
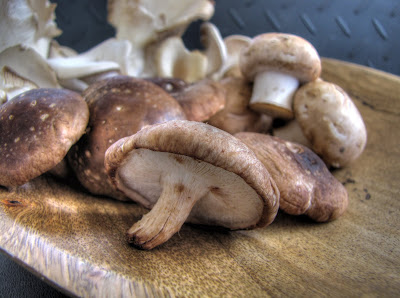
Here's a subtly HDR-ified photo of a plate of shitake, crimini, and oyster mushrooms for your visual enjoyment and gastronomic salivation. ^_^
Sunday, January 18, 2009
The five minute artisan bread that took a week to make.
And now it's my turn! Hey, it had to happen at some point I suppose.
No-knead bread is something I've actually avoided ever since I first read about it one morning in the photo lab, on campus, a couple of years ago. Personally, if I want fresh bread, I want it today...not tomorrow. Then, a couple of weeks ago, while listening to The Splendid Table, I listened intently as Lynne spoke with Zoe Francois and Jeff Hertzberg, authors of Artisan Bread in Five Minutes a Day: The Discovery that Revolutionizes Home Baking. At first I thought their method was just another clone of the many recipes for no-knead bread which are mostly the same. The difference, and the step that really caught my attention, is that with this recipe, you actually want to let it age or ripen in the fridge for as long as two weeks. Now that had to make an interesting loaf!
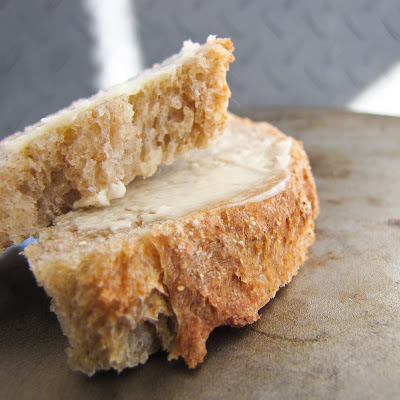
Another point I like about this bread is that ou needn't bake it all at once. I have actually been using small handfulls at a time to make even a single roll, or rolling out a little bit and making flatbread on the grill, so this is a batch that you can come back to all week long. At least, that's how long I've been aging my dough! And the longer you age it, the more intense and flavorful it becomes. After a week it has an almost sourdough-like flavor to it.
This, being my first attempt, I didn't mess with the recipe much, with the exception of replacing three cups of all purpose flour with whole wheat, just to give it a bit more flavor and a more old worldliness, I suppose you could say. Next time, which will be very soon, maybe even tomorrow, I may try using bread flour cut with rye flour, or maybe barley flour.
Five-Minute Artisan Bread
From Artisan Bread in Five Minutes a Day: The Discovery that Revolutionizes Home Baking by Jeff Hertzberg and Zoe Francois (Thomas Dunne Books, 2007). Copyright 2007 by Jeff Hertzberg and Zoe Francois.
Serves 4
Note: This recipe must be prepared in advance.
1-1/2 tablespoons granulated yeast (about 1-1/2 packets)
1-1/2 tablespoons kosher salt
6-1/2 cups unbleached flour, plus extra for dusting dough
Cornmeal
In a large plastic resealable container, mix yeast and salt into 3 cups lukewarm (about 100 degrees) water. Using a large spoon, stir in flour, mixing until mixture is uniformly moist with no dry patches. Do not knead. Dough will be wet and loose enough to conform to shape of plastic container. Cover, but not with an airtight lid.
Let dough rise at room temperature, until dough begins to flatten on top or collapse, at least 2 hours and up to 5 hours. (At this point, dough can be refrigerated up to 2 weeks; refrigerated dough is easier to work with than room-temperature dough, so the authors recommend that first-time bakers refrigerate dough overnight or at least 3 hours.)
When ready to bake, sprinkle cornmeal on a pizza peel. Place a broiler pan on bottom rack of oven. Place baking stone on middle rack and preheat oven to 450 degrees, preheating baking stone for at least 20 minutes.
Sprinkle a little flour on dough and on your hands. Pull dough up and, using a serrated knife, cut off a grapefruit-size piece (about 1 pound). Working for 30 to 60 seconds (and adding flour as needed to prevent dough from sticking to hands; most dusting flour will fall off, it's not intended to be incorporated into dough), turn dough in hands, gently stretching surface of dough, rotating ball a quarter-turn as you go, creating a rounded top and a bunched bottom.
Place shaped dough on prepared pizza peel and let rest, uncovered, for 40 minutes. Repeat with remaining dough or refrigerate it in lidded container. (Even one day's storage improves flavor and texture of bread. Dough can also be frozen in 1-pound portions in airtight containers and defrosted overnight in refrigerator prior to baking day.) Dust dough with flour.
Using a serrated knife, slash top of dough in three parallel, 1/4-inch deep cuts (or in a tic-tac-toe pattern). Slide dough onto preheated baking stone. Pour 1 cup hot tap water into broiler pan and quickly close oven door to trap steam. Bake until crust is well-browned and firm to the touch, about 30 minutes. Remove from oven to a wire rack and cool completely.
Monday, December 29, 2008
Belated Christmas Cookies!
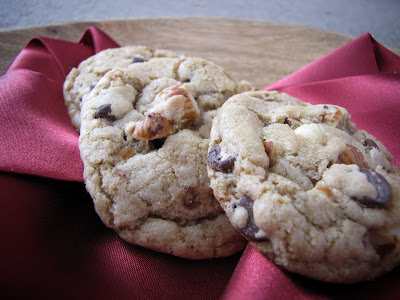
Now, these are no ordinary cookies, oh no, these cookies are truly of the magical variety; the recipe of which come not from a mere cookbook, but from the pen of Mrs. Santa herself. Allow me to regale you with the tale of how I came by this recipe...
About five years ago, in the month of December, my family and I were at the Heber Valley Railway Station enjoying the sites and sounds of the old rail station turned museum, when something amazing happened. A sky full of snow danced down from the heavens. "From outside came the sounds of hissing steam and squeaking metal. I looked through window and saw a train standing perfectly still."
Everyone rushed outside to the old platform to see a wondrous train, hung with the holly and the ivy, and garland. I looked at the engine and tried to read the big, white letters but could not make them out amid the steam. We all marveled at the site, wondering what to happen next? Was the train for us? Where would it take us? As we all talked and wondered at the mystery and the magic, a shadow, hidden in the steam, was seen to emerge from the front car of the train. Though most everyone stepped back, not knowing who or what it was, one little girl stood still without fear, looking with wonder at the shadow as it stepped out from the mist to reveal a nice old man, dressed in a conductor's uniform, a warm smile, framed in wrinkles, sitting on his face. He looked like he could be anyone's favorite grandpa. He patted the child on her head, then looked at the crowd.
"Well? You all coming?" he asked.
"Where?" the girl asked.
"Why, to the North Pole, of course!" He said, joy pulsing from his being. "This is the Polar Express!"
I would be lying if I said we all jumped on board without hesitation, but the conductor's warm smile reassured us. What followed is best documented in Chris Van Allsburg's "The Polar Express." As you may remember in the book, cookies and hot chocolate were served, and truly magical cookies the were, as they were made by Mrs. Santa herself. So delicious were those cookie that I could not help but ask for the recipe. After a few minutes, a grandmotherly woman, dressed in a red winter dress, trimmed in white, walked into the car. She came up to me, looked me over, and smiled.
"A cook's heart, pure and good, always striving for the perfect cookie and cake and showing his love and friendship with his cooking. Here you are, young man," and she gave me a red card with a recipe on it, and she walked away.
"The Polar Express is about faith, and the power of imagination to sustain faith. It's also about the desire to reside in a world where magic can happen, the kind of world we all believed in as children, but one that disappears as we grow older.” - Chris Van Allsburg
And it's all true, every letter! Well...most of it, anyway, and here's the very recipe she gave to me, which I have up until recently, kept secret. In the spirit of the season, however, I have decided to share it with the world!
Mrs. Santa's Magical Cookies
by Kay Shean
1½ cups white sugar.
The giggle from an elf
2 cups of brown sugar
Found high on a shelf.
1 pound of sweet butter
A reindeer’s shy wink,
Three eggs freshly chosen,
Fairy Dust colored pink,
1½ teaspoons salt
A wish from a child,
1½ teaspoons soda,
One griffin smile-wild.
6 cups of white flour,
One gallon of joy
The twinkle that’s found
in a small girl or boy.
2 cups nuts if you like them,
if not, leave them out.
4 cups chocolate chips.
Remove all signs of doubt.
2 tablespoons vanilla
A huge dash of love,
A sprinkle of peace
From the wings of a dove.
Cream the butter and sugars, ten minutes for sure,
Mix in the giggle and winks, add the eggs and beat more.
Add salt, soda, flour, fairy dust and the wish,
The griffin’s sweet smile and beat well - What a dish!
Add the chips and vanilla, and nut if you will,
Scoop with small ice cream scooper and your cookie sheets fill.
Bake 350 degrees, 7 minutes ‘til done,
Eat with love, joy and peace and have bundles of fun!
Joyeux Noël, everyone, even if I am a bit late in saying so.
Tuesday, December 2, 2008
Breaking cheese at Harmon's.
What luck! And I gotta tell ya, there is nothing like biting into a fresh sliver of Parmigiano-Reggiano, just taken from the core of the newly broken wheel, to die for. ^_^
(You'll have to excuse the poor photos, all I had was my camera phone. It was better than nothing, but doesn't compare to a real camera.)

A whole wheel of Parmigiano-Reggiano, about to be opened.

John scores the wheel to ensure an even break.

In go the wedges.
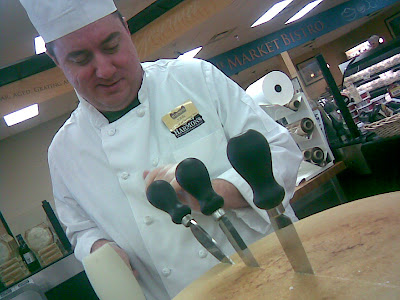
It took some work, but he got them all through the rind.

Out comes, and in goes, the big knife.

Ah, a newly opened canyon of Parmigiano-Reggiano!
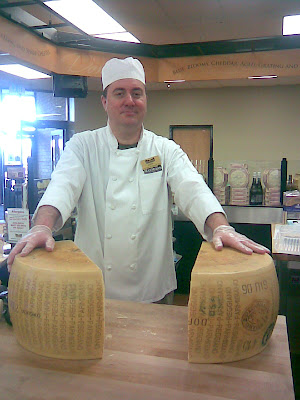
John, the big cheese of Harmon's. Sorry, I couldn't resist. ^_^;
Thursday, November 27, 2008
A few minutes of Thanksgiving downtime with an Apple and Prune Tart.

Mmm, rustic and warming. Perfect for the Thanksgiving dessert table!
Apple and Prune TartNow, back to the madness, such as it is. I still have pumpkin butter to make!
via Epicurious.com
For pastry dough
1 1/4 cups all-purpose flour
1 stick (1/2 cup) unsalted butter
1/4 teaspoon salt
3 to 5 tablespoons ice water
For filling
1/3 cup water
2 tablespoons Calvados
1 cup packed pitted prunes (7 oz), halved
1 teaspoon cinnamon
Pinch of ground cloves
5 tablespoons all-purpose flour
3/4 cup sugar
2 pounds tart green apples
1 1/2 tablespoons fresh lemon juice
1/2 cup nut pieces, toasted
1 tablespoon whole milk
1 tablespoon sugar
Make dough:
Blend together flour, butter, and salt in a bowl with your fingertips or a pastry blender (or pulse in a food processor) just until mixture resembles coarse meal with some small (roughly pea-size) butter lumps. Drizzle 3 tablespoons ice water evenly over mixture and gently stir with a fork (or pulse) until incorporated.Squeeze a small handful of dough: If it doesn't hold together, add more ice water, 1/2 tablespoon at a time, stirring (or pulsing) until incorporated. Do not overwork dough, or pastry will be tough.
Turn out dough onto a work surface. Divide dough into 4 portions. With heel of your hand, smear each portion once or twice in a forward motion to help distribute fat. Gather all dough together with pastry scraper. Press into a ball, then flatten into a 5-inch disk.
Wrap dough in plastic wrap and chill until firm, at least 1 hour.
Make filling:
Simmer water, Calvados, and prunes, uncovered, until most of liquid is absorbed, about 10 minutes. Remove from heat and cool.Preheat oven to 400°F.
Stir together cinnamon, cloves, 2 tablespoons flour, and 1/2 cup sugar.
Peel and core apples and cut into 1/2-inch wedges. Halve wedges crosswise and toss with cinnamon mixture. Add lemon juice and toss to coat.
Finely grind walnuts with remaining 3 tablespoons flour and remaining 1/4 cup sugar in a food processor.
Assemble and bake tart:
Roll out dough on a lightly floured surface into a 14- by 18-inch oval. Roll dough loosely onto floured rolling pin and unroll onto a large buttered baking sheet. Sprinkle walnut mixture over pastry, leaving a 2 1/2- to 3-inch border.Stir stewed prunes into apple mixture and spoon over walnut mixture, evenly tucking prunes between apple pieces. Turn edge of dough over fruit to form pleats. Brush top of dough with milk and sprinkle with sugar.
Bake tart, loosely covered with foil, in middle of oven 30 minutes. Remove foil and bake until crust and fruit are golden and juices are bubbling, about 30 minutes more. Cool tart on baking sheet on a rack at least 20 minutes before serving.
P.S. Did anyone else see the Rick Roll they pulled in the Macy's Parade? I think it's a bit late for the meme, but I enjoyed it nonetheless. ^_^
Enjoy!
Monday, November 24, 2008
Lubkuchen: Time to put that candied peel to work!
Well, regardless of where the impulse originated, I'm certainly glad it did, as these cookies are Christmas cookies incarnate! Plus they're made with the candied citrus peel I told you about yesterday! (double score!)
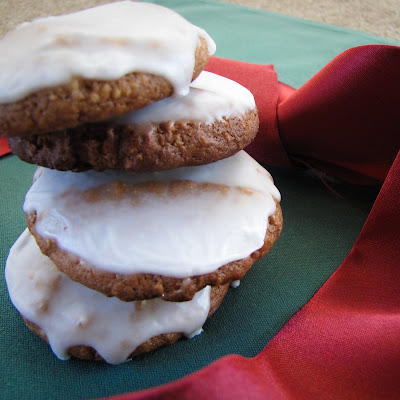
Lebkuchen are essentially a soft, German spice cookie (one among many). The base is a nut flour mixture, sweetened with honey and flavored with cinnamon, clove, ginger, and candied citrus peel. Originating in Franconia, Germany, the lebkuchen has had a place in traditional German Christmas celebration since the late 13th century. So the cookies have been around for over 700 years, they gotta be winners with that kind of record!
The recipe isn't hard, and is pretty straight forward. It is also fairly traditional from the sources I've looked at, and the lebkuchen I've tasted in the past. The only real part where I deviate from tradition is that in traditional lebkuchen, you place the cookie dough balls onto oblaten, a thin wafer cookie, which prevents them from cementing themselves to the pan. I've been unable to find small oblaten anywhere but online, and I'm not really keen on having to have them shipped every time I want lebkuchen. Thus I just bake mine on a parchment paper, which works beautifully. You could also do as the recipe suggests and use rice paper.
Lebkuchen
via Epicurious.com
For nut flour
3/4 cup hazelnuts (3 1/2 oz)
3/4 cup sliced almonds (2 1/2 oz)
2 3/4 cups all-purpose flour
3 tablespoons unsweetened cocoa powder
1 tablespoon ground cinnamon
1 teaspoon ground ginger
1/2 teaspoon ground cloves
3/4 teaspoon salt
1/2 teaspoon baking powder
1/4 teaspoon baking soda
For cookies
1 cup packed dark brown sugar
3/4 cup mild honey
1/2 stick (1/4 cup) unsalted butter, softened
2 large eggs
1/2 cup finely chopped fine-quality mixed candied fruit such as citron, orange, and lemon
4 (11 1/2- by 8 1/4-inch) sheets edible rice paper, cut with scissors into 32 (2 1/2-inch) rounds (optional)
For icing
2 cups confectioners sugar
3 tablespoons waterMake nut flour:
Finely grind nuts with remaining nut flour ingredients in a food processor.Make dough:
Beat together brown sugar, honey, and butter in a large bowl with an electric mixer at medium-high speed until creamy. Add eggs 1 at a time, beating well after each addition. Mix in nut flour at low speed until just blended, then stir in candied fruit.Preheat oven to 350°F.
Arrange rice-paper rounds, shiny sides down, on 2 large baking sheets. Roll level 2-tablespoon amounts of dough into balls with dampened hands, then put 1 on each paper round and flatten slightly (dough will spread to cover paper during baking).
Bake cookies in upper and lower thirds of oven, switching position of sheets halfway through baking, until surface no longer appears wet, about 15 minutes total. Transfer to racks to cool.
Ice cookies:
Sift confectioners sugar into a bowl, then stir in water until smooth. Evenly brush tops of cooled cookies with icing. Let icing set, about 1 hour.
Fröhliche Weihnachten!
Sunday, November 23, 2008
Making Candied Cirtus Peel for Lebkuchen
I think not. "I shan't," I declared, "sully the good name of lebkuchen with such a thing." Nor, however, could I go without. So I decided, with the help from some friends at BakeSpace, it was time to take these lebkuchen to the next level with homemade citrus peel!
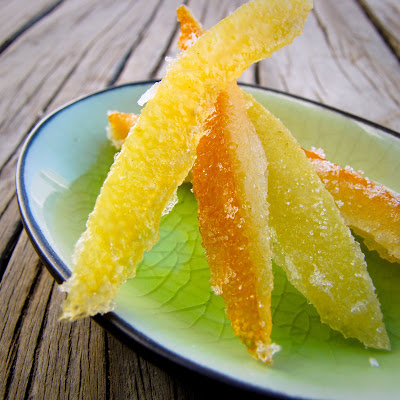
I know what you're thinking, I must be crazy to first make an ingredient from scratch to the be added to another recipe. Maybe I am crazy, but believe me when I tell you that it's so simple that you will never again resort to buying candied peel.
You need a mere three ingredients to make candied citrus peel. Water, sugar, and your citrus peel of choice. Three simple ingredients that, when combined alchemically, yield this shimmering, sweet and slightly bitter, but always elegant treat.
Candied Orange and Lemon Peel
The peel of 2 oranges (including pith), cut into 1/4 inch strips
The peel of 3 lemons (including pith), cut into 1/4 inch strips
2 cups white sugar
1 cup water
Take your peels and put them into a large sauce pan and cover with water and het on high. Let boil 20 minutes. Drain.
In another pan, combine sugar and 1 cup water over high heat, stirring until sugar dissolves. Heat on high until the syrup reaches 230º F. Add the peels, reduce heat and simmer for 5 minutes, stirring frequently. Drain.
Separate pieces on a wire rack, sprinkle with more sugar. Let dry for several hours. Store in a cool, dry place.
What about the lebkuchen, you ask? You'll just have to wait until tomorrow for that tasty conclusion. ^_^
Friday, November 21, 2008
Cranberry and Apple Relish
Now don't get me wrong, I think the red cylinder is okay, and has it's place in the kitchen (stir some into your oatmeal with some cinnamon, über délicieux!), but just not at the Thanksgiving table. Try telling that to my family or our friends. Thus it was that a few years ago I decided to try and show them the light and bring to Thanksgiving dinner real, honest to god, homemade, from scratch, cranberry sauce!
AND...it was a flop. No one touched it, except for a pity nibble from Rita. To ad insult to insult, I was actually ridiculed for making it myself. Joking comments along the lines of, "Traditional cranberry sauce not good enough for ya?" and so forth. I tried again the next year, but yielded similar results. I have therefor decided that though this year I will again make my own sauce for Thanksgiving, I'll just keep it at home, private reserve, if you will.
Most recipes I've tried over the years involve cranberries, water, a lot of sugar and varying spices. All have been either simmered or baked and yield a candy-like sauce that though might good, is also very sweet and often heavy on the palate. I was therefor pleasantly surprised when I found and made this recipe for a cranberry-pear relish on FoodNetwork.com.
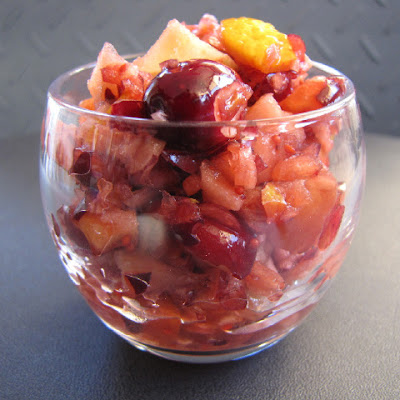
The relish is completely raw and is simply thrown together in a food processor, so it's fast and easy. I also find that the rawness makes the relish lighter in the mouth than its cooked counterparts. It strikes me as a grown-up variation on the Thanksgiving classic, being nicely balanced with the sweetness of the pear (well, I actually used an apple because that's what I had on hand), the acidity from the orange juice, tartness from the cranberries, and bitterness from the orange peel and pith (yes, you literally throw in an entire orange). It also uses only a half cup of sugar, versus to the one or more cups in previous recipes I tried. I actually used less than that and sill found it plenty sweet to ward off the tartness, especially after a day in the fridge.
Cranberry-Pear (or Apple) Relish
via Food Network, all credit to them for a wonderful recipe
1 small navel orange
1 (12-ounce) bag fresh or frozen cranberries
1 Bartlett pear or an apple, cored and cut into large chunks
1/4 to 1/2 cup brown sugar
Pinch kosher salt
3 tablespoons pecans or other nut, toasted and coarsely chopped
Wash and dry the orange. Cut the orange into small wedges, including the peel, and put in a food processor. Add the cranberries, pear, sugar, and salt. Pulse until coarsely chopped. Transfer to a bowl, cover, and refrigerate for at least 2 hours and up to 2 days. Just before serving, stir in the pecans.
On a related note, I'd like to introduce the newest member of Cogito Team...my new Canon SX10 IS!

With his help, I hope to bring you ever tastier blog posts through ever more delicious photography.
Wednesday, November 5, 2008
Cooking with Alicia & Annie: Amish Shoofly Tart
The challenge: Choose a recipe from either Alicia or Annie's recipe sites, make it, shoot it, and blog it.
The stakes: The Holiday Baker's Bundle, a collection of collapsible bowls, measuring cups, cookie cutters, etc.
...Bring it on!
I chose the take another crack at the odd-ball Amish Shoofly Pie, a molasses pie of Amish and Pennsylvania Dutch origin. I've tried making this simple dessert before, and had mixed results. The pie was overall good, but the crust (having been par baked before adding the filling) came out, shall we say, "over-caramelized," i.e. burnt.
Now it was time for Round 2, and this time I'd call it a sweet success!
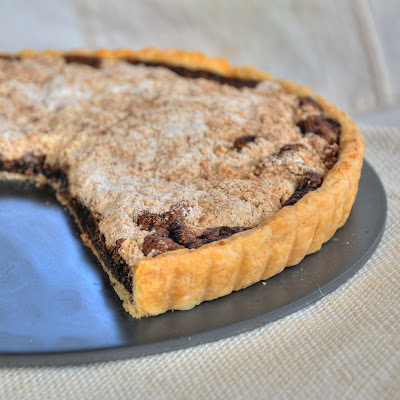
I stayed true to the original recipe except for two things: First, I cut the recipe in half to make one pie, rather than two. Second, I was aching to try my new tart pan, so in lieu of a pie pan, a tart pan it was. I also reduced the baking temps a bit, same with the time.
Amish Shoofly Tart
Crumb Mixture
1 c. flour
6 tbsp. brown sugar
3 tbsp. butter
1/4 tsp. nutmeg
1/2 tsp. cinnamon
SYRUP MIXTURE
1/2 c. molasses
1/4 c. brown sugar
1 egg
1/2 c. hot water
1/2 tsp. baking soda, dissolved in the hot water
1 (unbaked) 11" tart crust
Instructions
Mix crumb ingredients together until crumbs are formed. In separate bowl, mix syrup ingredients together. Pour the syrup into the tart shell, then top with crumbs.
Bake at 375 degrees for 10 minutes. Reduce heat to 350 degrees and bake for 45 more minutes, until the crust is, as Alton Brown would say, golden brown and delicious.
Cool completely before cutting.
If you've never tried shoofly pie, the flavor can be hard to describe. As I ate it, I couldn't help but think that I had tasted this somewhere before, but where? Then it hit me! Shoofly pie tastes remarkably like a S'mores Pop-Tart, only much better!
Monday, September 29, 2008
Springerle season kick-off, 2008.

Those who were following my trials and tribulations last year, will remember my ongoing issue with big hollows forming in the cookies (pillowing, as I've dubbed it), and that I had to make some adjustments to the recipe. I think those adjustments have worked well, and I made another change by using extra large eggs, rather than just large eggs. I think the added moisture went a long way to help the dough stay "coherent," you might say. No large voids, no pillows, just a consistent cookie. And look, they grew perfect feet!

Now, the hardest part of all, allowing the springerle to ripen for a week before eating any more of them! ^_^;
Here's the recipe I've been using, along with my alterations...
Whole Egg Springerle
from cookiemolds.com
originally published by Sharon Hudgins
"Edible Art," The World and I Magazine, Dec. 2001
4 extra large eggs, at room temperature
1/2 tsp anise extract
4 cups confectioners' sugar*
grated zest of 1 lemon
4 cups all purpose flour*
3/4 tsp. baking powder
Optional: 2 Tbsp. whole anise seed
* First sift, then measure by spooning gently into a measuring cup and
leveling off the top with a knife.
Beat eggs in a large bowl with an electric mixer on high speed for 10 minutes, until they are very pale and thick. Reduce mixer speed to medium; add anise oil. Gradually add confectioners' sugar, 2 tablespoons at a time, beating continuously. After all the sugar has been added, beat on high speed for 10 minutes longer. Stir in grated lemon zest.
Sift flour and baking powder together into another bowl. Gradually stir into egg mixture, 1/2 cup at a time, mixing with a large wooden spoon until dough is smooth. Transfer dough to a floured pastry board and knead by hand for 5 minutes, until dough is soft and smooth and doesn't stick to your hands. Wrap dough securely in Plastic wrap and refrigerate for 2 to 3 hours.
Lightly butter (or spray with PAM) two large cookie sheets (not the air insulated variety). Optional:Put anise seed into a small plastic bag and crush them lightly with a rolling pin. Sprinkle crushed anise seed evenly over the cookie sheets.
Lightly dust a pastry board with flour or confectioners' sugar. Break off one-fourth of the chilled dough, leaving the remainder tightly wrapped in plastic (at room temperature if you are working quickly, or return to refrigerator if you not). Working quickly, because it dries rapidly, roll out dough with a standard rolling pin to a thickness of 1/4 inch. Dust top of dough lightly with confectioners' sugar, flour, or cornstarch.
Dust the mold to be used with confectioners' sugar and shake off excess. If using flat Springerle boards, press them firmly into the dough, to stamp the designs on the dough. If using a Springerle rolling pin, roll it only once firmly across the sheet of dough. With a fluted pastry cutter, pizza cutter, or sharp knife, cut the imprinted dough into individual cookies, each with a separate design in the middle. (If you plan to use the cookies as ornaments, punch a hole in the top of each with a skewer or matchstick. After baking, put a ribbon or piece of yarn through the hole to hang cookies on the tree.)
Use a spatula to transfer Springerle cookies to the baking sheets, placing cookies 1/2 inch apart Roll, stamp, and cut the remaining dough, re-rolling any scraps, until all the dough has been used. Let unbaked cookies sit in the open air, uncovered, in a warm room (away from children and pets) for 12 to 24 hours to dry thoroughly.
Preheat oven to 275ºF. Bake cookies on the middle rack of the oven, one baking sheet at a time, for 20 to 25 minutes. Watch carefully; don't let them over bake. They should be white on the top and pale golden on the bottom. Immediately remove the cookies from the baking sheets and transfer them to wire racks to cool for at least 1 hour. Brush remaining anise seed (if used) into an airtight container to use for storing Springerle.
When they have cooled completely, put them into the container with half an apple or a slice of bread set on top of the cookies, to make the Springerle soften while their flavor is developing. Cover container tightly. Leave cookies in container for at least 1 week (and up to 4 weeks), changing the apple or bread every few days to prevent mold from growing.
After their flavor has been allowed to ripen, Springerle can be eaten or stored for longer periods in the freezer. Stack them in a plastic freezer container, with a piece of wax paper between each
layer of cookies. Serve Springerle with coffee, tea, or a glass of chilled, not-too-dry, Alsatian, Rhine, or Mosel white wine. Makes approximately 60 two-inch-square Springerle cookies. (yield will vary, depending on size of cookie molds used.)
Note: Springerle cookies can be left totally white, or the designs on them can be painted with edible coloring materials.
Monday, September 22, 2008
New springerle mold.
This time 'round I purchased a smaller mold (2.5" x 3.5") featuring a proud/prancing reindeer/stag. It's Christmassy, to be sure, but I can also see using it for a sort of St. Patrick's cookie, as in the White Stag of Celtic legend.
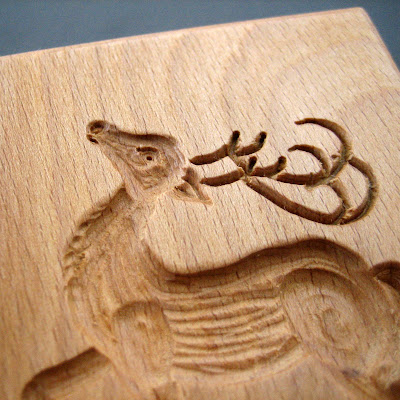
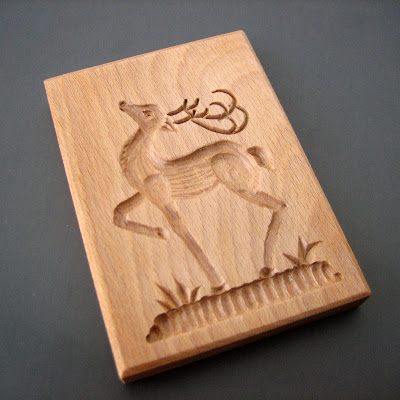
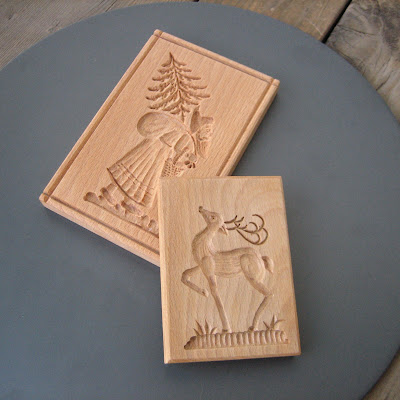
I'll keep you posted about my baking results. I think it's about time I got to practicing my springerle!
Saturday, September 13, 2008
Gingerbread: A spicy, autumnal, kick in the face!
One of my all-time favorite autumnal sweets (besides candy corn) is gingerbread. Not the cookies (though I love those, too), but the cake. However, I sometimes find it hard to find a suitable recipe. So many that I read extol the virtues of how there is "but a hint of spice," or "a touch of ginger," or "just a touch of molasses" to the flavor. Now, I don't know about you, but when I want gingerbread...I want gingerbread! None of this holding back of flavor. Give it to me full flavored and don't wimp out. I now think I've finally found a recipe that lives up to my demanding expectation, Gramercy Tavern's Gingerbread.
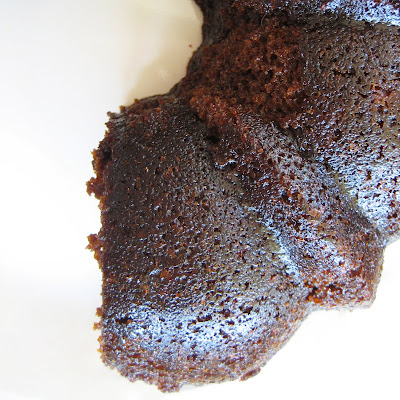
Another wonderful recipe from the folks at Gourmet Magazine, Gramercy Tavern Gingerbread is a dense, almost sticky cake that delivers a kick to the face, as spice and flavor goes. Hell, there's a heaping two tablespoons of ginger in this baby, plus an entire cup of dark molasses. You also get the pleasure of adding a cup of stout beer to the batter, and as we all know, beer makes food better.
I've used stouts in baking before, and yielded delicious results. I've used both Guinness and Sierra Nevada Stout, and both work. However, I have found that Guinness, though great when drunk straight up, does not deliver as much when used in baking. Therefor, I recommend Sierra Nevada Stout, here. It's got more chutzpah, which comes through well when added to a cake batter. You don't really taste the stout so much, but it helps to balance the three cups of sugar (1 cup each dark molasses, dark brown sugar, and white sugar) with some bitterness. It also adds richness to the gingerbread.
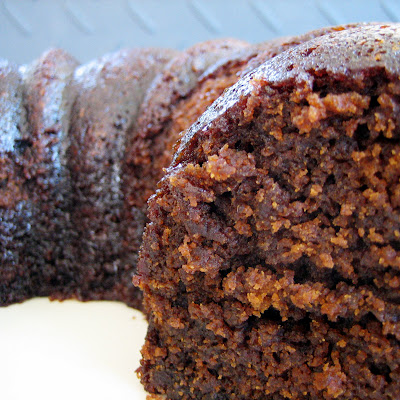
Hm...a second slice is looking good, right about now. ^_^;
Gramercy Tavern Gingerbread
via epicurious.com
1 cup oatmeal stout or Guinness Stout
1 cup dark molasses (not blackstrap)
1/2 teaspoon baking soda
2 cups all-purpose flour
1 1/2 teaspoons baking powder
2 tablespoons ground ginger
1 teaspoon ground cinnamon
1/4 teaspoon ground cloves
1/4 teaspoon freshly grated nutmeg
Pinch of ground cardamom
3 large eggs
1 cup packed dark brown sugar
1 cup granulated sugar
3/4 cup vegetable oil
Confectioners sugar for dustingSpecial equipment: a 10-inch (10- to 12-cup) bundt pan
Accompaniment: unsweetened whipped cream
Preheat oven to 350°F. Generously butter bundt pan and dust with flour, knocking out excess.
Bring stout and molasses to a boil in a large saucepan and remove from heat. Whisk in baking soda, then cool to room temperature.
Sift together flour, baking powder, and spices in a large bowl. Whisk together eggs and sugars. Whisk in oil, then molasses mixture. Add to flour mixture and whisk until just combined.
Pour batter into bundt pan and rap pan sharply on counter to eliminate air bubbles. Bake in middle of oven until a tester comes out with just a few moist crumbs adhering, about 50 minutes. Cool cake in pan on a rack 5 minutes. Turn out onto rack and cool completely.
Serve cake, dusted with confectioners sugar, with whipped cream.


