Showing posts with label chocolate. Show all posts

Wednesday, June 10, 2009

Galactic Cookies and Crappy Photoshopping...YAY!

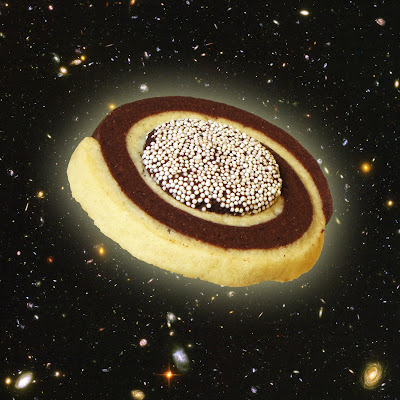
Just a quick post today and a really crappy Photoshop of one of the Galactic Spiral Shortbread Cookies I baked a few days ago. (Cut me some slack, I'm pressed for time this week, what with vacation prep and all!)


I've seen photos of these kinds of swirl cookies floating about Tastespotting and other food blogs and decided to add my own spin to them when I noticed their galactic nature. I settled on a recipe I found on FoodNetwork.com, but decided to top them with those chocolate buttons that are covered with those candy dots. I think the buttons add an accent of sweetness to an otherwise not-so-sweet cookie.

They are mighty tasty, though, if not a bit labour intensive. Give them a go if you're looking for a cookie with some visual punch for your next cookie swap!

Galactic Swirl Cookies
via FoodNetwork.com
modified by Tom


Vanilla Dough:

1/2 cup granulated sugar
2 tablespoons confectioners' sugar
1/4 teaspoon fine salt
1 large egg
1 to 1 1/4 teaspoons vanilla extract
1 cup unsalted butter, (2 sticks), room temperature
2 cups all-purpose flour

Chocolate Dough:

1 1/4 cups granulated sugar
3/4 cup natural cocoa powder
1/4 teaspoon fine salt
1 cup unsalted butter, (2 sticks) room temperature
1 large egg
1 1/2 cups all-purpose flour

About six dozen chocolate buttons

Directions

For the vanilla dough: Mix the 2 sugars and the salt together in a medium bowl. In another small bowl, whisk the egg and mint extract and set aside. With a hand held mixer beat the butter until smooth in a large bowl. While mixing, gradually add the sugar mixture, and continue beating until lightly colored and fluffy, about 1 to 2 minutes. Stop mixing and scrape down the sides of the bowl. Add the egg mixture and beat until smooth. Gradually add the flour, mixing slowly until blended.

Turn the dough out of the bowl, divide in half. Place the halves between 2 pieces of lightly floured parchment or waxed paper. Roll into a 10 by 12 by 1/4 inch rectangle. Slide the sheets of dough/parchment sheets onto a baking sheet, and refrigerate until firm, about 2 hours or overnight.

For the chocolate dough: Whisk the sugar, cocoa, salt in a medium bowl. With a hand held mixer beat the butter until smooth in a large bowl. While mixing, add the cocoa mixture, and continue beating until lightly colored and fluffy, 1 to 2 minutes. Stop mixing and scrape down the sides of the bowl. Add the egg and beat until smooth. Gradually add the flour, mixing slowly until blended.

Turn the dough out of the bowl, divide in half. Place the halves between 2 pieces of lightly floured parchment or waxed paper. Roll into a 10 by 12 by 1/4 inch rectangle. Slide the sheets of dough/parchment sheets onto a baking sheet, and refrigerate until firm, about 2 hours or overnight.

For a spiral cookie: Put 1 of the chocolate doughs on the workspace and remove the top sheet of parchment. Brush dough lightly with cold water. Place a sheet of vanilla dough on the workspace, and remove top sheet of paper. Using the bottom piece of the paper to lift the dough, place the vanilla dough on top of the chocolate dough. Take care to line up the edges of the 2 doughs and trim as needed. Lightly press to smooth and seal the doughs together. Remove the top piece of paper. Brush the surface of the dough lightly with cold water. Position the sandwiched doughs with the long edge facing you. Using the edge of the paper as a guide, roll the doughs into a tight cylinder, 2 inches wide. Wrap in plastic and refrigerate for 1 hour. Repeat with remaining 2 sheets of dough.

Evenly position racks in the oven, and preheat to 325 degrees F.

Slice the dough crosswise into 1/4-inch thick cookies. Lay about 1/2-inch apart on parchment-lined baking sheets. Bake until just golden - not too dark you'll lose the definition of the spiral, about 14 to 16 minutes. After removing from oven, place one chocolate button in the center of each cookie. Allow cookies to cool until chocolate re-solidifies. I put mine in the fridge to expidite this process.

Tuesday, February 24, 2009

Chocolate + Cardamom + Bread = T3h Awesome!

Work and life in general have both conspired to keep me too busy to do much in the way of baking or blogging, as of late. Thus, when I had two days off in a row (something of a rarity for me) I decided to take advantage of it and get off my lazy ass and bake something!

I don't know why, but the thought of a chocolate bread popped into my mind pretty quickly. I did not, however, want to end up baking what amounted to a chocolate loaf cake...I wanted bread, the kind with yeast you get to knead in a Tai Chi-like motion, thus gaining peace and mental centrality. (I think I just made up that last bit, but it sounds good so I'm rolling with it!) I hunted about for recipes and finally found one that fit the bill!


The bread come out looking like a loaf of whole wheat bread, even though it's all just unbleached AP flour--ah, the wonders of unsweetened cocoa powder. The chocolate flavor isn't apparent at first, but it sinks in as you chew. I took a little liberty with the recipe and added in a couple of pods worth of fresh ground cardamom seed (my favorite spice), which gave it that little something of curiosity. The white you see on top of the loaf is just more flour, though I did consider powdered sugar, but wanting to keep with a non-sweet chocolate bread, I opted instead for flour.

All and all I do like the bread, and it makes for a killer peanut butter and jelly sandwich!

Chocolate Cardamom Bread
via About.com and tweaked just slightly by moi.


4 cups Unbleached AP Flour, approx.
¼ cup Unsweetened Cocoa Powder
2 tbsp Sugar
1 tbsp Brown Sugar
2 ¼ tsp (or one packet) Active Dry Yeast
1 tsp Salt
1 tbsp Vegetable Oil
1 ½ cups Warm Water (about 110°F)

In large bow, mix together 2 cups bread flour, cocoa, sugar, brown sugar, yeast, salt, oil, and water. Mix in the remaining flour, about a quarter cup at a time, until a soft dough forms. Turn dough out onto lightly floured board and knead for 5 minutes, adding only a small sprinkle of flour each time the dough gets too sticky.

Put dough in greased bowl. Turn dough over in bowl so that the dough top is also lightly greased. Cover bowl with plastic wrap or clean kitchen cloth and let rise in warm place for 1 hour.

Punch down dough. Turn dough out onto board and knead for another 5 minutes. Shape dough into loaf. Put loaf in greased 9x5-inch loaf pan. Cover loaf and let rise for about 30 minutes or until double in size.

Bake at 400°F for about 25 minutes or until bread sounds hollow when you tap on it.

Monday, December 29, 2008

Belated Christmas Cookies!

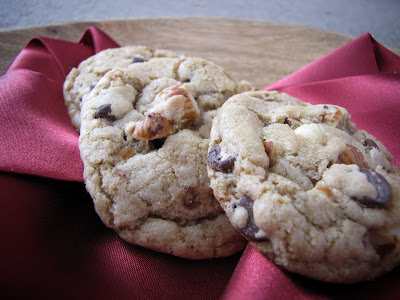
Whew! What a busy month...not so much with the baking, but with work. The problem about working the retail shtick (even specialty retail) is the non-stop work work work nature of the Christmas season. It's been so hectic and exhausting that I had few chances to do much baking this year. Bummer, and now Christmas is come and gone...but that doesn't mean I can't get caught up, not does it? After all, Christmas cookies taste just as sweet, rich, and delicious after Christmas as they do at the height of the season! Therefor may I present to you, Mrs. Santa's Magical Cookies...


Now, these are no ordinary cookies, oh no, these cookies are truly of the magical variety; the recipe of which come not from a mere cookbook, but from the pen of Mrs. Santa herself. Allow me to regale you with the tale of how I came by this recipe...

About five years ago, in the month of December, my family and I were at the Heber Valley Railway Station enjoying the sites and sounds of the old rail station turned museum, when something amazing happened. A sky full of snow danced down from the heavens. "From outside came the sounds of hissing steam and squeaking metal. I looked through window and saw a train standing perfectly still."

Everyone rushed outside to the old platform to see a wondrous train, hung with the holly and the ivy, and garland. I looked at the engine and tried to read the big, white letters but could not make them out amid the steam. We all marveled at the site, wondering what to happen next? Was the train for us? Where would it take us? As we all talked and wondered at the mystery and the magic, a shadow, hidden in the steam, was seen to emerge from the front car of the train. Though most everyone stepped back, not knowing who or what it was, one little girl stood still without fear, looking with wonder at the shadow as it stepped out from the mist to reveal a nice old man, dressed in a conductor's uniform, a warm smile, framed in wrinkles, sitting on his face. He looked like he could be anyone's favorite grandpa. He patted the child on her head, then looked at the crowd.

"Well? You all coming?" he asked.

"Where?" the girl asked.

"Why, to the North Pole, of course!" He said, joy pulsing from his being. "This is the Polar Express!"

I would be lying if I said we all jumped on board without hesitation, but the conductor's warm smile reassured us. What followed is best documented in Chris Van Allsburg's "The Polar Express." As you may remember in the book, cookies and hot chocolate were served, and truly magical cookies the were, as they were made by Mrs. Santa herself. So delicious were those cookie that I could not help but ask for the recipe. After a few minutes, a grandmotherly woman, dressed in a red winter dress, trimmed in white, walked into the car. She came up to me, looked me over, and smiled.

"A cook's heart, pure and good, always striving for the perfect cookie and cake and showing his love and friendship with his cooking. Here you are, young man," and she gave me a red card with a recipe on it, and she walked away.

"The Polar Express is about faith, and the power of imagination to sustain faith. It's also about the desire to reside in a world where magic can happen, the kind of world we all believed in as children, but one that disappears as we grow older.” - Chris Van Allsburg

And it's all true, every letter! Well...most of it, anyway, and here's the very recipe she gave to me, which I have up until recently, kept secret. In the spirit of the season, however, I have decided to share it with the world!

Mrs. Santa's Magical Cookies
by Kay Shean

1½ cups white sugar.
The giggle from an elf

2 cups of brown sugar

Found high on a shelf.

1 pound of sweet butter

A reindeer’s shy wink,

Three eggs freshly chosen,

Fairy Dust colored pink,

1½ teaspoons salt

A wish from a child,

1½ teaspoons soda,

One griffin smile-wild.

6 cups of white flour,

One gallon of joy

The twinkle that’s found

in a small girl or boy.

2 cups nuts if you like them,

if not, leave them out.

4 cups chocolate chips.

Remove all signs of doubt.

2 tablespoons vanilla

A huge dash of love,

A sprinkle of peace

From the wings of a dove.


Cream the butter and sugars, ten minutes for sure,

Mix in the giggle and winks, add the eggs and beat more.

Add salt, soda, flour, fairy dust and the wish,

The griffin’s sweet smile and beat well - What a dish!

Add the chips and vanilla, and nut if you will,

Scoop with small ice cream scooper and your cookie sheets fill.

Bake 350 degrees, 7 minutes ‘til done,

Eat with love, joy and peace and have bundles of fun!


Joyeux Noël, everyone, even if I am a bit late in saying so.


Thursday, July 19, 2007

Chocolate Stout Cake, Modification and Gift Thereof.

When my dad's birthday began to near, I decided that the best gift I could give him was not an impersonal DVD or some other mass produced thingamajig or gadget. When I think about gifts, my mind often goes back to Ralph Waldo Emerson's essay "Essay V: Gifts." In the essay, Emerson reflects on the nature and purpose of gift giving. In the second paragraph, Emerson explains it perfectly...
"Next to things of necessity, the rule for a gift, which one of my friends prescribed, is, that we might convey to some person that which properly belonged to his character, and was easily associated with him in thought. But our tokens of compliment and love are for the most part barbarous. Rings and other jewels are not gifts, but apologies for gifts. The only gift is a portion of thyself. Thou must bleed for me. Therefore the poet brings his poem; the shepherd, his lamb; the farmer, corn; the miner, a gem; the sailor, coral and shells; the painter, his picture; the girl, a handkerchief of her own sewing. This is right and pleasing, for it restores society in so far to its primary basis, when a man's biography is conveyed in his gift, and every man's wealth is an index of his merit. But it is a cold, lifeless business when you go to the shops to buy me something, which does not represent your life and talent, but a goldsmith's. This is fit for kings, and rich men who represent kings, and a false state of property, to make presents of gold and silver stuffs, as a kind of symbolical sin-offering, or payment of black-mail."

Following this thought, I decided that the best gift I could give my dad was a birthday cake, baked from scratch, in the spirit of his birthday. After much looking, I finally happened upon a cake that I thought he would truly appreciate, and enjoy, a Chocolate Stout Cake. I decided on this cake for a number of reason, including the fact that my dad does love beer, and stout, like Guinness, is one of my favorite styles of beer. Instead of using the ubiquitous Guinness, though, I decided to use my favorite American stout, Sierra Nevada Stout. It's a lot like Guinness, but with more chutzpah.

This recipe has been floating about the internet since after its original publication Bon Appétit Magazine, September 2002, and according to every review I read (and input at the BakeSpace forums) this recipe was to make a monster of a cake. Three 8-inch layers, with batter to spare. There was only one problem with this, and that is that I don't own a single 8-inch cake pan, nor could I really afford to go and buy three. I do however own a couple of 9-inch pans as well as a 9-inch springform that has produced good cake results in the past. So I decided to make a two layer 9-inch cake using a cake pan and my springform.

My thoughts then turned to the apparent large quantity of batter. I felt pretty certain that the two pans would not be able to accommodate so much batter, and not wanting to either guess too much about temperature and time alterations or throw away perfectly good batter, I instead decided to take the hard route and reduce the recipe by 1/4, which wasn't really that hard, and I ended up with some pretty reasonable measurements. I also went and replaced the sour cream with low-fat yogurt, just to make it a little less bad for you. (The recipe is at the end.) So I set forth hoping for the best, but preparing for the worst. By that I mean making sure I had enough money to run to Harmon's and buy a cake, if all else failed.

Here are the results after baking the two layers.


Looking very good, so far. Actually, these look better than most round cakes I've attempted lately. Nice and flat without any sink holes.

The frosting is a bit on the odd side. I suppose that you would classify it as a ganache, though it's texture before completely set is more like a pudding. It is good though, deep, dark, rich chocolate flavor without being too sweet. A frosting for grown-ups, I suppose. I found it easiest to spread it on the cake before it had completely set up. It made for easier spreading and a cleaner appearance.

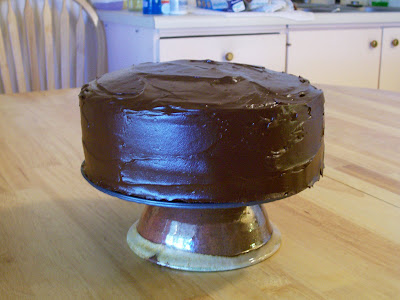
Et voilà!


Beautiful, and one of my better frosting jobs, to boot!

Oops, almost forgot the recipe.

Chocolate Stout Cake à la Tom

Cake

1 1/2 cups stout (such as Sierra Nevada Stout or Guinness)
1 1/2 cups (3 sticks) unsalted butter
1 1/8 cups unsweetened cocoa powder (preferably Dutch-process)

3 cups all purpose flour
3 cups sugar
3/4 tablespoon baking soda
1 1/8 teaspoons salt
3 large eggs
1 cup natural, plain low-fat yogurt

Icing
1 1/2 cups whipping cream
3/4 pound bittersweet (not unsweetened) or semisweet chocolate, chopped

For cake:
Preheat oven to 350°F. Butter two 9-inch round cake pans with 2-inch-high sides. Line with parchment paper. Butter paper. Bring 1 1/2 cups stout and 1 1/2 cups butter to simmer in heavy large saucepan over medium heat. Add cocoa powder and whisk until mixture is smooth. Cool slightly.

Whisk flour, sugar, baking soda, and 1 1/8 teaspoons salt in large bowl to blend. Using electric mixer, beat eggs and sour cream in another large bowl to blend. Add stout-chocolate mixture to egg mixture and beat just to combine. Add flour mixture and beat briefly on slow speed. Using rubber spatula, fold batter until completely combined. Divide batter equally among prepared pans. Bake cakes until tester inserted into center of cakes comes out clean, about 35 minutes. Transfer cakes to rack; cool 10 minutes. Turn cakes out onto rack and cool completely.

For icing:
Bring cream to simmer in heavy medium saucepan. Remove from heat. Add chopped chocolate and whisk until melted and smooth. Refrigerate until icing is spreadable, stirring frequently, about 2 hours.

Place 1 cake layer on plate. Spread 2/3-ish cup icing over. Top with second cake layer. Spread remaining icing over top and sides of cake.

Culinary Epilogue (6:41 AM, 7/20/2007): The cake was delicious. It's pretty dense and rich, like a devil's food cake, and not too sweet. The stout, though not overt, adds a noticeable richness to the cake and a hoppiness that is especially tasted in the first few bites. When you sink your teeth in for the first bite, the beer announces its presence with gusto and ushers your taste buds into the chocolaty party, then steps aside and allows you to enjoy the cake, while itself staying off to the side, but keeping things interesting.

Saturday, June 30, 2007

Chocolate cookies and chiles...who'da thunk?

Some time ago, I happened on an amazing recipe for Dark Chocolate Oatmeal Cookies. The recipe is pretty simple and also original in that rather than using standard issue rolled oats the cookies use steel-cut or Irish oats. Though great, I was bothered by the seemingly needless inclusion of a mere two tablespoons of oatmeal. The average oatmeal cookie is full of oats, whereas with these cookies the oats were more of an al dente punctuation. I couldn't help but think "Are these oats even necessary? Can I do away with them and still obtain the same cookie?" I'm afraid that I didn't follow up on those thoughts...until today.

I took a long, hard look at the recipe and decided that it needed some tweeking, for the better I assure you. I first decided to double the recipe, as the original only yielded 12 cookies. Seriously...who bakes only 12 cookies? I then turned my attention to the oats, and thought of removing them from the recipe. At first I had been hesitant, as doing so could throw off the moisture balance in to cookies. However, I decided that since steel-cut oats take so long to cook and absorb moisture (about 20 minutes in boiling water) I figured that they would not have enough time to absorb any moisture from the dough to begin with. So out with 'em! Next I changed the semi-sweet chocolate chips to bittersweet chocolate chunks. The darker the chocolate, the better--in my book anyway. I also increased the amount of chocolate chunks from 1/4 cup (1/2 cup in the doubled recipe) to 2/3 cup in order to make up for the lost mass of the oats and besides, more chocolate is better, yes?

Finally came the biggest change in the recipe. I had thought back to the many instances I had read about, or seen segments of Food Network about chocolatiers and confectioners who had added the heat of chilies to chocolate truffles and fudge with great results. The Aztecs also added chilies to their chocolate, and if it's good enough for them, well, who am I to argue? I therefore added the new secret ingredient...


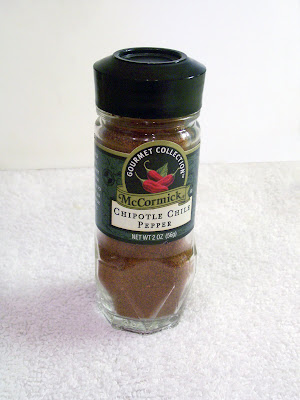
one teaspoon of dried chipotle powder.

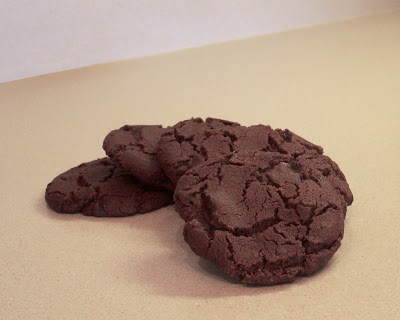
You don't really feel the heat when you first bite into the cookie, until you swallow, then the heat makes its debut in the back of your throat. As you eat the cookie you can feel the heat slowly accumulating in your mouth. It's not an intense heat by any stretch of the word. It's a mellow, pleasant warmth that augments the rich chocolate body of the cookie. If the cocoa is the soul of the cookie, then surely the chipotle is the passion within that soul. It gives that extra kick to life.


Dark Chocolate Chipotle Cookies

1½ cups all-purpose flour
½ cup unsweetened (natural) cocoa powder
1 tsp. baking soda
½ tsp. salt
1/2 - 1 tsp. chipotle powder
1 cup (2 sticks) unsalted butter at room temperature
1 cup sugar
1 tsp. vanilla extract
2/3 cup bittersweet chocolate chunks

Heat oven to 350° F.

Line a sheet pan with parchment paper.

Sift together first 5 ingredients into a bowl. In a mixer, beat butter until fluffy. Add sugar and vanilla, beat until well blended. Add flour mixture and bet until moist clumps form. On low speed, mix in bittersweet chocolate chunks, just until evenly incorporated.

Shape half of dough by heaping tablespoonfuls into balls, flatten into 2 inch rounds. Place rounds onto parchment paper, spacing evenly, about 2 inches apart. Repeat with other half of dough.

Bake until center is slightly firm and top is nicely cracked, about 12 - 14 minutes. Cool on sheet pan for 2 minutes, then transfer to cooling rack. Cool completely.

Enjoy!

Makes 24 cookies.