Monday, March 16, 2009

Blood Orange Marmalade

Okay, things are coming along and I'm starting to find my way back to ol' Cogito (sounds like an artisan brand of apertif or whiskey...I call dibs on the trademark!).

I decided, yesterday, to get off my keester and actually do some cooking; as I've been without much in the way culinary inspiration as of late, evidenced by my lack of posts this year, thus far. Yesterday, however, while at Harmon's I saw they had blood oranges for a reasonable $1.19/lb and was instantly hit with an idea...blood orange marmalade! I grabbed a bag of oranges and went home and looked for recipes.

I recalled having seen a recent episode of Good Eats where Alton Brown focused on the orange and even made marmalade. Alton's recipes have never let me down, so I decided his was the one. It is simple and pretty straight forward, which is what I like about Alton's recipes, he doesn't monkey around, just good food done right.
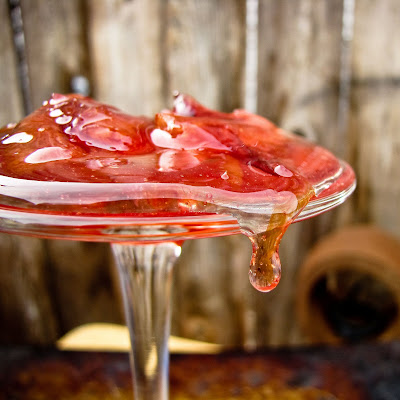


The blood oranges gave the marmalade a rich, ruby color and a slightly more tart flavor than other marmalades that I've had. It really does have a sense of being a more "grown up" marmalade. The only complaint I have is that there must be something awry in the recipe. First off, the recipe says that it should take 15 to 20 minutes for the marmalade to heat to 222°F, it took mine nearly an hour. I've never had it take so long to heat a pot of preserves. Also, now that it's set, the marmalade is very stiff, sticky and almost candy-like in texture. All the marmalades I've had in the past have a more loose consistency. I'm not sure if this is how Alton Brown intended in to be, or if there's a flaw in the recipe. I also ended up with about 60 oz. of marmalade, rather than the 80 oz. the recipe said I should have. It is good, though, and I do recommend you give it a try. Maybe we can compare notes and figure out what may or may not have gone wrong or right.

Blood Orange Marmalade
via Alton Brown's Good Eats

1 3/4 pounds blood oranges, 4 to 5
1 lemon, zest finely grated and juiced
6 cups water
3 pounds plus 12 ounces sugar
Special Equipment: 10 (8-ounce) canning jars with rings and lids, funnel, tongs, ladle, and 12-quart pot

Wash the oranges and lemon thoroughly. Cut the oranges into 1/8-inch slices using a mandoline, removing the seeds as you go. Stack the orange slices and cut them into quarters. Place the oranges into an 8-quart stainless steel pot. Add the lemon zest and juice and the water to the pot, set over high heat and bring to a boil, approximately 10 minutes. Once boiling, reduce the heat to maintain a rapid simmer and cook, stirring frequently, for 40 minutes or until the fruit is very soft.

While the fruit is cooking, fill a large pot (at least 12-quart) 3/4 full with water, set over high heat and bring to a boil. Place 10 (8-ounce) jars and rings, canning funnel, ladle, and tongs into the boiling water and make sure the water covers the jars by at least an inch. Boil for 10 minutes. Turn off the heat, add the lids and leave everything in the pot until the marmalade is ready.

Meanwhile, place a small plate in the freezer. Increase the heat under the orange mixture to return to full boil. Add the sugar and stir the mixture continually, until it reaches 222 to 223 degrees F on a deep-fry or candy thermometer, and darkens in color, approximately 15 to 20 minutes. You may need to adjust the heat in order to prevent boil over. Test the readiness of the marmalade by placing a teaspoon of the mixture onto the chilled plate and allowing it to sit for 30 seconds. Tilt the plate. The mixture should be a soft gel that moves slightly. If mixture is thin and runs easily, it is not ready.

Remove jars from the water and drain on a clean towel. Place a canning funnel onto the top of 1 of the jars and ladle in the marmalade just to below the bottom of the threads of the jar. Repeat until all of the mixture has been used. The amount of marmalade may vary by 1 to 2 jars. Wipe the rims and threads of the jars with a moist paper towel and top each with a lid. Place a ring on each jar and tighten.

Return the jars to the pot with boiling water, being certain that they don't touch the bottom of the pot or each other. (If you don't have a jar rack, try a round cake rack, or metal mesh basket. Even a folded kitchen towel on the pot bottom will do in a pinch.) Add additional water if necessary to cover the jars by at least an inch. Boil for 10 minutes. Using canning tongs, carefully remove the jars from the water, place in a cool dry place and allow to sit at room temperature for at least 24 hours before opening. Once open, store in the refrigerator. Unopened marmalade will last for up to 6 month.

I also want to note that if the canning portion of the recipe doesn't appeal to you, then you can also just freeze the marmalade. I wanted to go all out, though, so I pulled out my canning equipment and boiled away!


Epilogue: This morning I took my open jar of marmalade, popped it in the microwave at 50% power for about thirty seconds, then stirred in about one or two tablespoons of hot water. After sitting in the fridge for a couple of hours I found that it loosened up, so it's easier to scoop and has a consistency I more associate with a marmalade.

Tuesday, February 24, 2009

Chocolate + Cardamom + Bread = T3h Awesome!

Work and life in general have both conspired to keep me too busy to do much in the way of baking or blogging, as of late. Thus, when I had two days off in a row (something of a rarity for me) I decided to take advantage of it and get off my lazy ass and bake something!

I don't know why, but the thought of a chocolate bread popped into my mind pretty quickly. I did not, however, want to end up baking what amounted to a chocolate loaf cake...I wanted bread, the kind with yeast you get to knead in a Tai Chi-like motion, thus gaining peace and mental centrality. (I think I just made up that last bit, but it sounds good so I'm rolling with it!) I hunted about for recipes and finally found one that fit the bill!


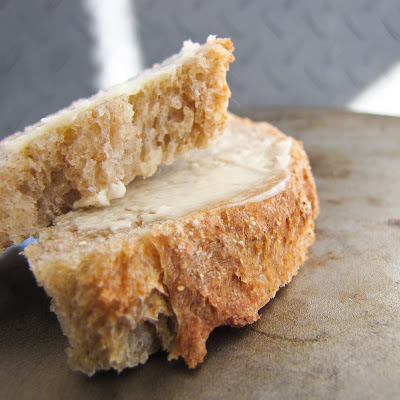
The bread come out looking like a loaf of whole wheat bread, even though it's all just unbleached AP flour--ah, the wonders of unsweetened cocoa powder. The chocolate flavor isn't apparent at first, but it sinks in as you chew. I took a little liberty with the recipe and added in a couple of pods worth of fresh ground cardamom seed (my favorite spice), which gave it that little something of curiosity. The white you see on top of the loaf is just more flour, though I did consider powdered sugar, but wanting to keep with a non-sweet chocolate bread, I opted instead for flour.

All and all I do like the bread, and it makes for a killer peanut butter and jelly sandwich!

Chocolate Cardamom Bread
via About.com and tweaked just slightly by moi.


4 cups Unbleached AP Flour, approx.
¼ cup Unsweetened Cocoa Powder
2 tbsp Sugar
1 tbsp Brown Sugar
2 ¼ tsp (or one packet) Active Dry Yeast
1 tsp Salt
1 tbsp Vegetable Oil
1 ½ cups Warm Water (about 110°F)

In large bow, mix together 2 cups bread flour, cocoa, sugar, brown sugar, yeast, salt, oil, and water. Mix in the remaining flour, about a quarter cup at a time, until a soft dough forms. Turn dough out onto lightly floured board and knead for 5 minutes, adding only a small sprinkle of flour each time the dough gets too sticky.

Put dough in greased bowl. Turn dough over in bowl so that the dough top is also lightly greased. Cover bowl with plastic wrap or clean kitchen cloth and let rise in warm place for 1 hour.

Punch down dough. Turn dough out onto board and knead for another 5 minutes. Shape dough into loaf. Put loaf in greased 9x5-inch loaf pan. Cover loaf and let rise for about 30 minutes or until double in size.

Bake at 400°F for about 25 minutes or until bread sounds hollow when you tap on it.

Friday, February 20, 2009

Excuses

Sorry for the lack of posts, as of late. Just haven't had a whole lot of free time to do a lot of cooking or photographing or writing. I've also been suffering from a lack of inspiration, really. I've been through this many a time before and this, too, will pass. I've actually been ruminating over the many bags of frozen elderberries, and what to do with them. Perhaps some elderberry liqueur, or elderberry jam?

Hang in there folks and satisfy your hunger by rummaging through my previous posts to hopefully find your own inspiration.

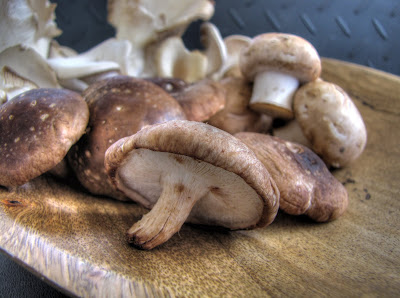
Here's a subtly HDR-ified photo of a plate of shitake, crimini, and oyster mushrooms for your visual enjoyment and gastronomic salivation. ^_^


Sunday, January 18, 2009

The five minute artisan bread that took a week to make.

It's been a couple of years since Mark Bittman and the New York Times published their first articles on various no-knead breads, which have since popped up on sites like Tastespotting and many a food blog.

And now it's my turn! Hey, it had to happen at some point I suppose.

No-knead bread is something I've actually avoided ever since I first read about it one morning in the photo lab, on campus, a couple of years ago. Personally, if I want fresh bread, I want it today...not tomorrow. Then, a couple of weeks ago, while listening to The Splendid Table, I listened intently as Lynne spoke with Zoe Francois and Jeff Hertzberg, authors of Artisan Bread in Five Minutes a Day: The Discovery that Revolutionizes Home Baking. At first I thought their method was just another clone of the many recipes for no-knead bread which are mostly the same. The difference, and the step that really caught my attention, is that with this recipe, you actually want to let it age or ripen in the fridge for as long as two weeks. Now that had to make an interesting loaf!


Another point I like about this bread is that ou needn't bake it all at once. I have actually been using small handfulls at a time to make even a single roll, or rolling out a little bit and making flatbread on the grill, so this is a batch that you can come back to all week long. At least, that's how long I've been aging my dough! And the longer you age it, the more intense and flavorful it becomes. After a week it has an almost sourdough-like flavor to it.

This, being my first attempt, I didn't mess with the recipe much, with the exception of replacing three cups of all purpose flour with whole wheat, just to give it a bit more flavor and a more old worldliness, I suppose you could say. Next time, which will be very soon, maybe even tomorrow, I may try using bread flour cut with rye flour, or maybe barley flour.

Five-Minute Artisan Bread
From Artisan Bread in Five Minutes a Day: The Discovery that Revolutionizes Home Baking by Jeff Hertzberg and Zoe Francois (Thomas Dunne Books, 2007). Copyright 2007 by Jeff Hertzberg and Zoe Francois.


Serves 4

Note: This recipe must be prepared in advance.

1-1/2 tablespoons granulated yeast (about 1-1/2 packets)
1-1/2 tablespoons kosher salt
6-1/2 cups unbleached flour, plus extra for dusting dough
Cornmeal

In a large plastic resealable container, mix yeast and salt into 3 cups lukewarm (about 100 degrees) water. Using a large spoon, stir in flour, mixing until mixture is uniformly moist with no dry patches. Do not knead. Dough will be wet and loose enough to conform to shape of plastic container. Cover, but not with an airtight lid.

Let dough rise at room temperature, until dough begins to flatten on top or collapse, at least 2 hours and up to 5 hours. (At this point, dough can be refrigerated up to 2 weeks; refrigerated dough is easier to work with than room-temperature dough, so the authors recommend that first-time bakers refrigerate dough overnight or at least 3 hours.)

When ready to bake, sprinkle cornmeal on a pizza peel. Place a broiler pan on bottom rack of oven. Place baking stone on middle rack and preheat oven to 450 degrees, preheating baking stone for at least 20 minutes.

Sprinkle a little flour on dough and on your hands. Pull dough up and, using a serrated knife, cut off a grapefruit-size piece (about 1 pound). Working for 30 to 60 seconds (and adding flour as needed to prevent dough from sticking to hands; most dusting flour will fall off, it's not intended to be incorporated into dough), turn dough in hands, gently stretching surface of dough, rotating ball a quarter-turn as you go, creating a rounded top and a bunched bottom.

Place shaped dough on prepared pizza peel and let rest, uncovered, for 40 minutes. Repeat with remaining dough or refrigerate it in lidded container. (Even one day's storage improves flavor and texture of bread. Dough can also be frozen in 1-pound portions in airtight containers and defrosted overnight in refrigerator prior to baking day.) Dust dough with flour.

Using a serrated knife, slash top of dough in three parallel, 1/4-inch deep cuts (or in a tic-tac-toe pattern). Slide dough onto preheated baking stone. Pour 1 cup hot tap water into broiler pan and quickly close oven door to trap steam. Bake until crust is well-browned and firm to the touch, about 30 minutes. Remove from oven to a wire rack and cool completely.


Monday, December 29, 2008

Belated Christmas Cookies!

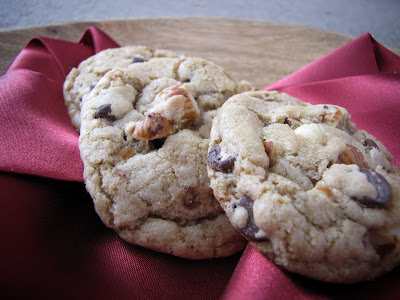
Whew! What a busy month...not so much with the baking, but with work. The problem about working the retail shtick (even specialty retail) is the non-stop work work work nature of the Christmas season. It's been so hectic and exhausting that I had few chances to do much baking this year. Bummer, and now Christmas is come and gone...but that doesn't mean I can't get caught up, not does it? After all, Christmas cookies taste just as sweet, rich, and delicious after Christmas as they do at the height of the season! Therefor may I present to you, Mrs. Santa's Magical Cookies...


Now, these are no ordinary cookies, oh no, these cookies are truly of the magical variety; the recipe of which come not from a mere cookbook, but from the pen of Mrs. Santa herself. Allow me to regale you with the tale of how I came by this recipe...

About five years ago, in the month of December, my family and I were at the Heber Valley Railway Station enjoying the sites and sounds of the old rail station turned museum, when something amazing happened. A sky full of snow danced down from the heavens. "From outside came the sounds of hissing steam and squeaking metal. I looked through window and saw a train standing perfectly still."

Everyone rushed outside to the old platform to see a wondrous train, hung with the holly and the ivy, and garland. I looked at the engine and tried to read the big, white letters but could not make them out amid the steam. We all marveled at the site, wondering what to happen next? Was the train for us? Where would it take us? As we all talked and wondered at the mystery and the magic, a shadow, hidden in the steam, was seen to emerge from the front car of the train. Though most everyone stepped back, not knowing who or what it was, one little girl stood still without fear, looking with wonder at the shadow as it stepped out from the mist to reveal a nice old man, dressed in a conductor's uniform, a warm smile, framed in wrinkles, sitting on his face. He looked like he could be anyone's favorite grandpa. He patted the child on her head, then looked at the crowd.

"Well? You all coming?" he asked.

"Where?" the girl asked.

"Why, to the North Pole, of course!" He said, joy pulsing from his being. "This is the Polar Express!"

I would be lying if I said we all jumped on board without hesitation, but the conductor's warm smile reassured us. What followed is best documented in Chris Van Allsburg's "The Polar Express." As you may remember in the book, cookies and hot chocolate were served, and truly magical cookies the were, as they were made by Mrs. Santa herself. So delicious were those cookie that I could not help but ask for the recipe. After a few minutes, a grandmotherly woman, dressed in a red winter dress, trimmed in white, walked into the car. She came up to me, looked me over, and smiled.

"A cook's heart, pure and good, always striving for the perfect cookie and cake and showing his love and friendship with his cooking. Here you are, young man," and she gave me a red card with a recipe on it, and she walked away.

"The Polar Express is about faith, and the power of imagination to sustain faith. It's also about the desire to reside in a world where magic can happen, the kind of world we all believed in as children, but one that disappears as we grow older.” - Chris Van Allsburg

And it's all true, every letter! Well...most of it, anyway, and here's the very recipe she gave to me, which I have up until recently, kept secret. In the spirit of the season, however, I have decided to share it with the world!

Mrs. Santa's Magical Cookies
by Kay Shean

1½ cups white sugar.
The giggle from an elf

2 cups of brown sugar

Found high on a shelf.

1 pound of sweet butter

A reindeer’s shy wink,

Three eggs freshly chosen,

Fairy Dust colored pink,

1½ teaspoons salt

A wish from a child,

1½ teaspoons soda,

One griffin smile-wild.

6 cups of white flour,

One gallon of joy

The twinkle that’s found

in a small girl or boy.

2 cups nuts if you like them,

if not, leave them out.

4 cups chocolate chips.

Remove all signs of doubt.

2 tablespoons vanilla

A huge dash of love,

A sprinkle of peace

From the wings of a dove.


Cream the butter and sugars, ten minutes for sure,

Mix in the giggle and winks, add the eggs and beat more.

Add salt, soda, flour, fairy dust and the wish,

The griffin’s sweet smile and beat well - What a dish!

Add the chips and vanilla, and nut if you will,

Scoop with small ice cream scooper and your cookie sheets fill.

Bake 350 degrees, 7 minutes ‘til done,

Eat with love, joy and peace and have bundles of fun!


Joyeux Noël, everyone, even if I am a bit late in saying so.