Monday, August 18, 2008

Apple Butter, an Autumnal Preview

Autumn...it's still a little ways off, I know, but that doesn't mean I can't indulge in a little bit of Fall in August, does it? I think not! There's just something about Autumn that warms the heart. I guess that's why I love it so much. Plus, it doesn't hurt that the months of September, October, November, and December comprise Grand Tetrarchy of Cooking, what with Thanksgiving and Christmas. I love the flavors of pumpkin, spices, cranberries, cinnamon, cider, and, of course, apples. Thus it is with great joy, and a watering mouth, that I present you with...Baked Apple Butter (on toasted brioche anisée)!


As much as I love apples and apple butter, this is only the second time I'm ever made it. The last time was a year or two ago, when I used the recipe from the Complete Guide to Home Canning and Preserving. My main gripe with that recipe, though, is that it's all done on the stove, and you have to stir almost constantly while it cooked, lest it burn. It took almost an hour to cook down! My arms fell off...both of 'em! And if your stopped stirring, you were brought back to attention with a searing hot splatter of apple butter to the face. If that wasn't enough you were also instructed to use a food mill to puree the apples and remove the skins, thus took another hour. Then there was the matter of the spices, the USDA's recipe instructs you use a mouth-numbing 1 tbsp of ground cloves. Now, I like my apple butter spicy, but this was just ridiculous!

For these reasons, I went about searching for a similar, though easier, method of making apple butter, and one that used less sugar, too. I wanted an apple butter that was easy, tasty, and erring on the healthier side. And I think I found it.

I consulted many a recipe and combined the elements from each I liked, not the least of which is the fact that it's baked, so you don't have to worry about it scorching, and you only have to give 'er a stir every half-hour.

Baked Apple Butter

4 large Granny Smith apples
4 large Breaburn apples
1 cup unsweetened Apple Juice
1 cup Brown Sugar (or other sweetener)
2 (generous) tsp. ground Cinnamon
1/2 (generous) tsp. ground Cloves
1/4 (generous) tsp. ground Allspice
The ground up seeds of one large Green Cardamom Pod
Generous pinch of Salt

Core and cut the apples into chunks, but leave the skin on. Put apples and apple juice into a large sauce pan and boil over medium heat for 30 minutes.

Set oven to 275°F.

Using a stick blender, blend the apples and skins until smooth. You can also use a food processor or blender, working in batches.

Add the sugar , cinnamon, cloves, allspice, cardamom and salt. Stir to mix well. Pour into a 13x9 inch baking dish, and bake for 3 hours, stirring every half-hour, or until the butter reaches the consistency you like.

Notes:

- Feel free to use any kind apples you like, in this recipe, it's plenty flexible. I just happened to like the looks of the Granny Smiths and Braeburns today.

- If you can get apple cider, that would work great too. Cider is just yet to make an appearance around here, as yet.

- You can use white sugar, brown sugar, honey, or a sugar substitute. Just aim for a cup's worth. I didn't have enough brown sugar, so I topped it off with the Baker's Blend sugar substitute.

- Don't feel that you must use the cardamom, I know it can be hard to find, for some. I just love the warm, floral taste of the stuff so much...how could I not add it in? ^_^

- Next time, I'll probably add in some lime juice to lend a bit of acidity to the butter, to brighten it up a tad.

- This recipe is not meant to be processed and "put up," so be sure to keep it refrigerated.


Friday, August 15, 2008

Cahill's Irish Porter Cheddar

I was at Harmon's today (my favorite grocery store!) and picked up a wedge of Cahill's Irish Porter Cheddar.


The cheese is a medium cheddar, but before they press the curd, they mix in Irish porter beer, which creates a beautiful marbled cross section. The flavor is nicely filling, and has just a bit o' bite, with a sweetness from the beer. The cheese also has an interesting distinction in that they use vegetable rennet to form the curd, rather than the rennet from a sheep's stomach, so you [i]could[/i] call it a "vegetarian" cheese, assuming you're a lacto-vegetarian, of course; or like me, an ovo-pesco-lacto-vegetarian. ^_^;

I think that a drink pairing is pretty easy here, Guinness, of course! A pint of Polygamy Porter from Wasatch Brewery would also be a great option.

Slàinte!

Wednesday, August 13, 2008

Potage Luzienne

Some weeks ago, while wandering through Barnes & Noble and enjoying the smell of coffee and paper, I happened upon a jackpot of a find on a clearance table, Under the Sun: Caroline Conran's French Country Cooking. For $5.50, how could I not!? The book is filled with information on the ingredients, foods, and people of southern France, "...from Bordeaux to Nice..." and beyond. The recipes are pretty simple, down-home French cooking, you could say. None of the snooty stuff which often maligns French cooking in pop culture. Recipes include Sautéed Green Bell Peppers and Tomato Salad (Salade de Tomates aux Piments Verts), Cep and Potato Soup (Soupe aux Cépes), Lamb Couscous with Seven Vegetables (Couscous aux Sept Legumes), and Sweet Aniseed Brioche (Brioche Anisée) and so many more. Many of the recipes are accompanied with beautiful photographs, as well.

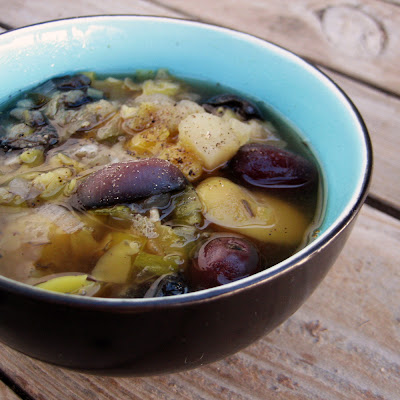
Tonight, I was set on making the Olive Soup from St.-Jean-de-Luz (Potage Luzienne).


Mmm, hearty, old world, rustic, and tasting of the country of the Pays Basque...at least, so I'd assume.

Olive Soup from St. Jean-de-Luz
(Potage Luzienne)
from Under the Sun, by Caroline Conran

1 cup dried fava beans, soaked for 2 hours until tender
1 smallish russet potato, peeled and diced
1 large leek, cleaned and sliced thinly
1 cup pitted kalamata olives
2 shallots, finely chopped
2 cloves garlic, finely chopped
1 tsp. dried thyme
salt and freshly ground black pepper
Slices of whole grain baguette, buttered and toasted and sprinkled with salt and pepper

Put the soaked and drained beans, potato, leek, olives, shallots, thyme and garlic into a dutch oven with 4 3/4 cups water. Bring to a boil, then cover and simmer on low for 1¼ to 1½ hours.

Add slat and pepper to taste, and id you'd like, briefly blend with a stick blender.

Serve topped with a slice of toasted baguette.

Bon appétit!


Wednesday, August 6, 2008

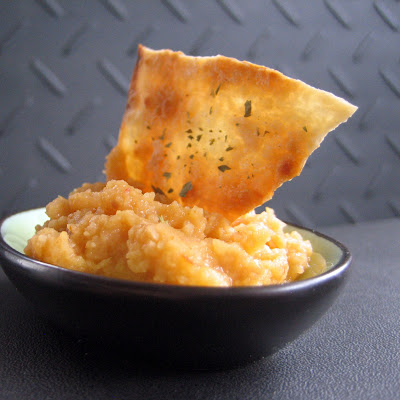
Curried Pineapple Hummus with Herbed Egg Roll Chips

I've said numerous times over on the BakeSpace forums, one of my all-time favorite food reads is 28 Cooks. There, Fiber has posted many a vegetarian (and pescetarian) delight, my favorite of which are her wonderfully flavorful and creative hummus recipes. Her hummuses (hummus's...hummuseses...hummi?) range from Thai Coconut Curry Hummus, to Cirtus Sesame Hummus, to Sundried Tomato Hummus, and Chipotle Cilantro and more. One recipe I made some time ago was her Pineapple Curry Hummus. I loved it and was inspired the other day to make my own variation on this unexpected combination of flavors.


Curried Pineapple Hummus with Herbed Egg Roll Chips!

My version is similar is concept, but differs somewhat in ingredients. Rather than using curry powder, I used red curry paste. Plus I added coconut milk in place of oil, to give a creamier consistency and a more curried flavor. Along side the hummus, I made Herbed Egg Roll Chips, which are relly no more than crispy egg roll wrappers with an some of Emeril's Asian Essence. They are wonderfully crisp and crunchy when you bite into them.

Curried Pineapple Hummus

All the ingredients are approximate, as I was simply adding them to taste. Feel free to adjust them to suit your own palette.

1 can garbonzo beans (chick peas)
1/4 cup pineapple chunks
1 - 1 1/2 tsp. red curry paste
1 - 2 tbsp. coconut milk
Pinch of salt

Combine all ingredients in a food processor and go at it until you reach the smoothness that suits you, add more or less liquid (including the juice from the pineapple chunks, if you'd like) to reach your desired consistency.

Herbed Egg Roll Chips

egg roll wrappers
Emeril's Asian Essence (or any other Asian spice mix)
cooking spray

Put a large, cast iron skillet over high heat.

Take an egg roll wrapper and spray it with a bit of cooking oil. Sprinkle with Asian Essence (or your choise of Asian, or non-Asian, herbes). Cook about 1 - 2 minutes on each side, until golden brown.

Allow the wrappers to cool, then break them into chips.


Monday, July 28, 2008

Homemade Marshmallows...now where's my 85% cacao Lindt chocolate bar?

Throughout all of my time exploring the endless facets of all things food and cooking, one thing has always managed to foil me at every attempt...sugar. More specifically, making candy requiring the boiling of sugar. Time and again, I have failed in my attempts to craft candy and confections alike; but not so on this day...

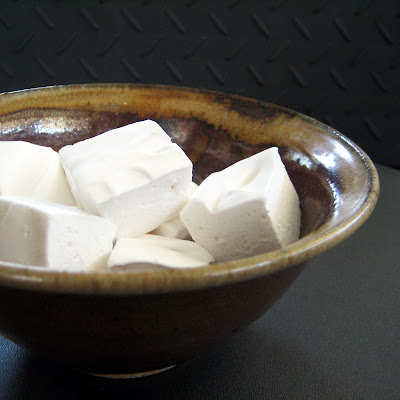
On this day I set out to conquer the sugar hurdle and attempt a recipe from this month's Bon Appétit, homemade marshmallows.


The recipe is pretty simple, consisting mostly of sugar, gelatin, vanilla, and water, along with a few other things, so the ingredients didn't cause me any consternation. What has always beaten me is the boiling of the sugar. This step, above all others, had me on my toes. One way or another, I always end up with a syrupy, crystalline mess in my pot, rather than a smooth, pourable, syrup. Today, however, I was careful, took my time, and double and triple check my temps. The temperature of the sugar was another issue for me. The recipe calls for you to boil the sugar until it reaches a final temperature of 240° F, which is fine if you're at sea level. Me, however, I live in northern Utah at an altitude of about 4500 feet. Living this high up, water boils not at 212°, but at 203°. This fact has been my undoing on many a baking or candy making endeavor, so I had to make an adjustment. After consulting a variety of sources, I settled on reducing the target temperature by 2° for ever 1000 feet about sea level. Thus I set my probe thermometer to start screaming at 231°. The results speak for themselves. ^_^


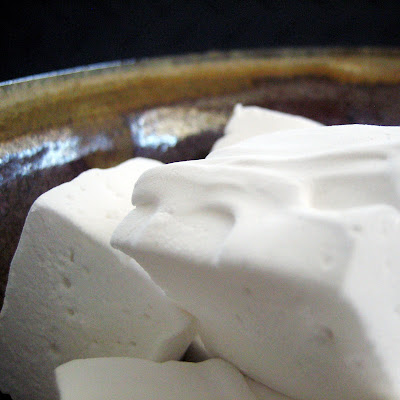
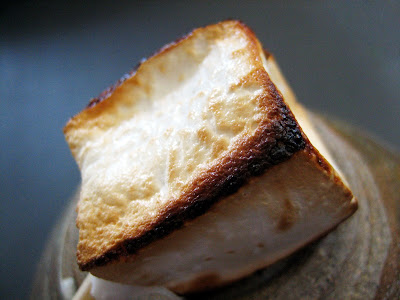
They taste just like marshmallows, so I think I can call them a success.

The great thing about the recipe, is that you can probably change out the vanilla for just about any flavor your heart desires, and the imagination can dream. Amaretto marshmallows, anyone? How about lemon, or chocolate, or coffee, or rum? The possibilities are quite intriguing. ^_^

And if you were about to ask, yes, they are wonderful when roasted atop the stove.


Homemade Marshmallows
à la Bon Appétit, July 2008

Nonstick vegetable oil spray
1 cup cold water, divided
3 1/4-ounce envelopes unflavored gelatin
2 cups sugar
2/3 cup light corn syrup
1/4 teaspoon salt
2 teaspoons vanilla extract
1/2 cup potato starch*

1/2 cup powdered sugar

Line 13x9x2-inch metal baking pan with foil.

Coat foil lightly with nonstick spray. Pour 1/2 cup cold water into bowl of heavy-duty mixer fitted with whisk attachment. Sprinkle gelatin over water. Let stand until gelatin softens and absorbs water, at least 15 minutes.

Combine 2 cups sugar, corn syrup, salt, and remaining 1/2 cup cold water in heavy medium saucepan. Stir over mediumlow heat until sugar dissolves, brushing down sides of pan with wet pastry brush. Attach candy thermometer to side of pan. Increase heat and bring syrup to boil. Boil, without stirring, until syrup reaches 240°F, about 8 minutes.

With mixer running at low speed, slowly pour hot syrup into gelatin mixture in thin stream down side of bowl (avoid pouring syrup onto whisk, as it may splash). Gradually increase speed to high and beat until mixture is very thick and stiff, about 15 minutes. Add vanilla and beat to blend, about 30 seconds longer.

Scrape marshmallow mixture into prepared pan. Smooth top with wet spatula. Let stand uncovered at room temperature until firm, about 4 hours.

Stir potato starch and powdered sugar in small bowl to blend. Sift generous dusting of starch-sugar mixture onto work surface, forming rectangle slightly larger than 13x9 inches. Turn marshmallow slab out onto starch-sugar mixture; peel off foil. Sift more starch-sugar mixture over marshmallow slab. Coat large sharp knife (or cookie cutters) with nonstick spray. Cut marshmallows into squares or other shapes. Toss each in remaining starch-sugar mixture to coat. Transfer marshmallows to rack, shaking off excess mixture.

*A food thickener made from cooked, dried, ground potatoes, this gluten free flour is also known as potato flour; available at most supermarkets.