Monday, January 14, 2008

Tofu Joes

For the past year-and-a-half or so, I have been sticking to a flexitarian diet, with pretty good success. I feel good, I feel healthy, I am saving money, and doing my part to shrink my carbon footprint without going through the hassles that some people go through. As part of my diet, I have been learning the ways of Tofu. My problem, however, is an inability to come up with new, creative ideas to use the stuff. I mean sure, stir-fry is great, but I quickly tire of the flavors of soy sauce, shredded cabbage, and bean sprouts. Thus my prayers were answered a few weeks ago while wandering through the aisles of Barnes & Noble when my eyes fell upon a small cookbook. Small, but full to bursting with ideas and recipes for tofu.

101 Things to do with Tofu, by Donna Kelly and Anne Tegtmeier, is a breath of fresh, non-soy sauce scented, air. Recipes range from the simple basics, like tofu fillets, to sauces, tofu Alfredo sauce, anyone?, to more creative fare, such as tofu tikka masala. Even desserts are covered, with recipes for raspberry chocolate chunk pie, chocolate cheesefake, and crème brûlée. On the menu today...Tofu Sloppy Joes.

This is one of those recipes that you need to plan ahead, as the first step is to freeze your tofu. Yes, freeze it. It sounded weird to me too the first time I did it, but in freezing the tofu you change the internal structure of the curd, causing it to release its water and become more porous and sponge-like.
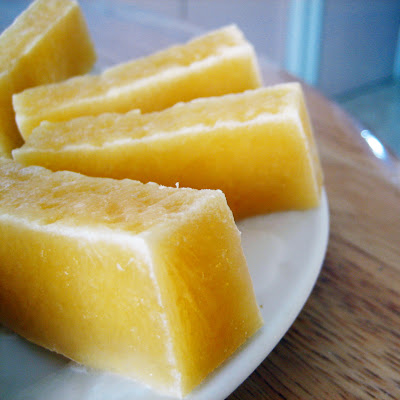


Yum, a hot, open-faced tofu sloppy joe. Tastes remarkably like a sloppy joe...who'da thunk? I think I'll be making this recipe again. ^_^

Here's the recipe, with a few personal alterations.

Tofu Sloppy Joes

1/4 cup diced red onion
1/4 cup diced green bell pepper
8 oz firm tofu, frozen then thawed
half a can of tomato paste
1 tbsp brown sugar
1 tbsp red wine vinegar
1/2 tsp garlic powder
1/2 cup water.

Sauté onion and green pepper in olive oil over medium heat for 2-3 minutes. Press tofu to dry and crumble into the pan, cook five minutes, stirring constantly. Add remaining ingredients and simmer ten minutes, stirring frequently. Serve on a bun, or in my case, an English muffin.


Santé!

After note: I was wandering through the State Liquor Store on Pacific Ave, today and my eyes fell upon a beer (or malt liquor, technically, I suppose) that held my attention and imagination.


Stay tuned for my review...if I'm still able to type after drinking it.

Thursday, January 10, 2008

Delicious Simplicity

After the month-and-a-half of ornate, intricate, rich baking and cooking, I decided that today I needed something different, something simple, basic.

White bread. Yeah, that's the ticket.

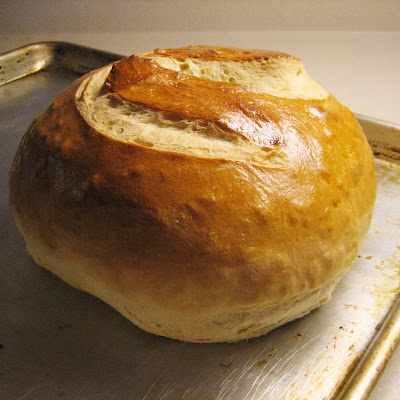
I had seen a posting via Tastespotting, from Jennie at Straight from the Farm and decided to take a crack at it.


It's fluffy, light, and fall of flavor, which is a challenge sometimes with white bread. It is indeed Miracle Bread.

MIRACLE BREAD

Part I
2 c. boiling water
2 T. butter
2 T. sugar
2 t. salt

Combine above ingredients and cool to lukewarm.

Part II
1/2 c. hot (but not boiling) water
2 packages of rapid rise dry yeast (2T.)
1 T. (scant) sugar

Whisk together Part II ingredients in a medium bowl and cover with a towel. Let yeast rise for 15-20 minutes, being sure it froths up and expands considerably. If yeast doesn’t rise, toss it and get new yeast before proceeding.

Once yeast has risen, combine with Part I. Add 6 to 6 1/2 cups of flour*, mixing with a spoon at first and then using your hands as it comes together. Add just enough flour to keep dough from being sticky. Knead dough for a few times and then cover bowl with a towel to let it rise. Come back to it every 10 minutes to punch it down and knead it some more, repeating this process 4-5 times. Don’t worry if you leave it longer - just be sure to punch it down a few times before proceeding with baking.

Divide dough in half at least once as it makes two large loaves. You can also divide it more times if you want to make smaller loaves or rolls. Place loaves on a greased baking sheet or in greased loaf pans. Cover again with a towel and let dough rise to double the size. If you want, you can use a sharp knife to make cuts in the dough to create ridges when they’re baked. I used an X shape this time on my round loaves for a nice artisan look.

Preheat oven to 375 F and bake risen loaves for 20 minutes or until lightly browned. Take loaves from the oven and brush with melted butter or spray with cooking spray to give loaves a nice sheen.

*The flour can be all unbleached white flour or a mixture of whole wheat and white flour. Use at least 3 cups of white flour or else the dough won’t be as forgiving.


Paix et santé!

Sunday, December 23, 2007

Camera Woes

Sorry, again, for the lack of posts, especially considering the Halloween/Thanksgiving/Christmas seasons. These should have been three prolific months, but between work and personal issues, I have been unable to do as much cooking or writing as I should have liked. Add to that the terror of our camera having been run-over, I have also been sans camera for some weeks now; and as we all know, a foodie blog is as much about the pictures as it is the writing.

It's ironic, really, I work in a camera store, but have no camera myself. -_-;

Oh the woes of saving money to move to Oregon (though the reward will be measureless).

Joyeux Noël!

Tuesday, December 4, 2007

Look who's here!

Boy, I just can't seem to keep myself from wandering off anymore, now can I?

I apologize (to all 20 of you), again, for the lack of consistent posting. I've been doing a lot of thinking about a lot of things, as of late. How to tolerate my present job (sales monkey at a camera store), how to find a job in Portland, how to get to Portland in the first place, love, and how to truly live (something that eludes me at every turn here in Utah). It's all a lot of little things that add-up to big dream.

Also, my camera broke. And as we all know, a foodie blog is as much about the pictures as it is the writing, or in my case "writing." You would think that working at a camera store would facilitate me having a good camera, but such is not the case, unfortunately.

I have been cooking though, and have found a good cookbook that I want to share with you all, soon.

Stay tuned, and Happy Christmas.

Tom

Sunday, November 4, 2007

Voyons! Mon premier tart tatin aux pommes!

Last week I was listening to NPR's All Things Considered. My interest became piqued when a segment celebrating my favorite Fall fruit, the apple, came on. In the report, chef Dorie Greenspan takes us through the simple process of making an apple tarte tatin (tarte tatin aux pommes, if my as yet poor French serves me).

Really more a technique than a recipe, the tarte tatin is a something of a deconstructed French apple pie (or pear pie, or peach pie, or tomato pie), and is really easy as pie, or easy as a tarte. Sorry, that wasn't even remotely funny. ^_^;